Showing posts with label Ismael Rac. Show all posts
Showing posts with label Ismael Rac. Show all posts
Sunday, December 21, 2014
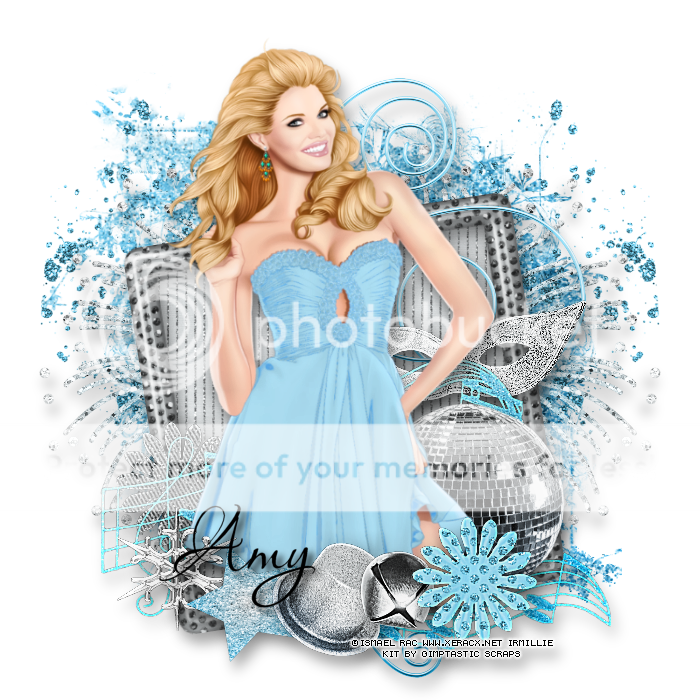
*click on image to view full size*
PTU Ready for The Party
This tutorial was written by me on December 21, 2014.
It was made out of my own creation and any similarity is purely coincidental.
I used pspx6 but any version should work without problems.
If you're doing this tutorial you must have good psp knowledge and be familiar with the tools.
Let's get started!
Artist: 2013 Valentine's Date by Ismael Rac
Scrapkit: Birthstone Series: Blue Topaz by Gimptastic Scraps
Mask: 44 by MB and SW
Font: Aquarelle
*open your mask and minimize in your workspace*
c/p = copy and paste, ds = drop shadow
File - New - 700x700 - flood fill w white
Open frame 4 - resize by 65% - rotate left some
Click inside your frame w magic wand - expand by 5 - new layer
Open paper1 - c/p into selection - deselect
Move paper under frame
Add ds to your frame
Open flower 1 - resize by 50% - place to bottom left - ds
Open swirl - place to the right - ds
Open mask - place to the right - ds
Open music notes - resize by 80% - place to bottom right - ds
Open disco ball - resize by 65% - place to bottom right - ds
Open tube
Recoloring tube to match the kit
Find the layer on the tube that is blue
Use your dropper tool to pick the light blue that matches
Make that your foreground color
With your color changer tool - left click on the blue layer of the tube
Do this until you are happy that it matches the way you like
Copy merged - place to the middle - resize to liking
Xero - radiance - change beauty to 71 - hit ok
Add drop shadow to your tube
Open snowflake - resize by 50% - place to bottom left - ds
Open star - resize by 50% - place to bottom right - ds
Open hat - resize by 50% - place to bottom - ds
Open bell - resize by 50% - place to bottom - ds
Open flower 2 - resize by 50% - place to bottom - ds
On background layer
Click on background with magic wand - new layer
Open paper5 - c/p into selection - deselect
Layers - New mask layer - From Image
Find your mask in source window - hit ok
Merge group
Resize mask by 90%
Duplicate mask - change blend mode to multiply - opacity to 63
Open glitter - place to left
Duplicate - mirror
Open fireworks - place to left
Duplicate - mirror
Delete background layer - merge visible
Adjust - Brightness and Contrast
Local Tone Mapping - strength 4.0 - Block Size 35 - hit ok
Add credits and name
Sunday, December 14, 2014

*click on image to view full size*
PTU New Years Kisses
This tutorial was written by me on December 14, 2014.
It was made out of my own creation and any similarity is purely coincidental.
I used pspx6 but any version should work without problems.
If you're doing this tutorial you must have good psp knowledge and be familiar with the tools.
Let's get started!
Artist: Mrs New Years by Ismael Rac
Scrapkit: Pop The Cork by Karras Kreative Korner
Font: Carlotta
*open your mask and minimize in your workspace*
c/p = copy and paste, ds = drop shadow
File - New - 700x700 - flood fill w white
Open frame 2 - c/p as new layer - move down a little bit
Click inside your frame w magic wand - expand by 5 - new layer
Open paper7 - c/p into selection - deselect
Move paper under frame
Add drop shadow to your frame
Open hanger - place to top - ds
Open glitter splatter - place to right - ds
Open champagne - resize by 50% - bottom left - ds
Open tube close up - c/p as new layer - resize to liking
Make sure tube is in the middle
Add drop shadow to your tube
Open ribbon 1 - place to bottom - ds
Open toasting glasses - resize by 50% - bottom left - ds
Open arrangement - resize by 85% - place to bottom right - ds
Open wordart 1 - place to bottom left - ds
Delete background - merge visible
Adjust - Brightness and Contrast
Local Tone Mapping - strength 4.0 - Block Size 35 - hit ok
Add credits and name
Saturday, December 13, 2014

*click on image to view full size*
PTU Happy 2015
This tutorial was written by me on December 13, 2014.
It was made out of my own creation and any similarity is purely coincidental.
I used pspx6 but any version should work without problems.
If you're doing this tutorial you must have good psp knowledge and be familiar with the tools.
Let's get started!
Artist: American Booty by Ismael Rac
Scrapkit: Resolutions by Niqui's Designs
Mask: 88 by me HERE
Plugins: Xero - Radiance
Font: Carlotta
*open your mask and minimize in your workspace*
c/p = copy and paste, ds = drop shadow
File - New - 700x700 - flood fill w white
Click on background with magic wand - new layer
Open paper of choice - c/p into selection - deselect
Layers - New mask layer - From Image
Find your mask in source window - hit ok
Merge group
Open 18 - resize by 85% - place to the right - ds
Open 15 - resize by 70% - c/p as new layer - ds
Open 52 - place to bottom right - ds - duplicate - mirror
Open 16 - resize by 70% - c/p as new layer - move to bottom
Click inside your frame w magic wand - expand by 5 - new layer
Open paper12 - c/p into selection - deselect
Move paper under frame
Add drop shadow to your frame
Open 49 - resize by 50% - place to the top - ds
Open 19 - resize by 50% - place to the top - ds
Open 18 - resize by 85% - place to left - ds
Open 11 - resize by 50% - place to the left - ds
Open 2 - resize by 50% - rotate to the right - place to right - ds
Open 70 - resize by 50% - place to bottom right - ds
Open tube - resize to liking - c/p as new layer
Xero - radiance - change beauty to 88 - hit ok
Open 5 - resize by 75% - place to bottom - rotate some - ds
Open 30 - resize by 50% 2x - sharpen - place to bottom left - ds
Open 3 - resize by 50% - place to bottom right - ds
Delete background layer - merge visible
Adjust - Brightness and Contrast
Local Tone Mapping - strength 4.0 - Block Size 35 - hit ok
Add credits and name
Thursday, November 20, 2014

*click on image to view full size*
PTU My Christmas Gifts
This tutorial was written by me on November 20, 2014.
It was made out of my own creation and any similarity is purely coincidental.
I used pspx6 but any version should work without problems.
If you're doing this tutorial you must have good psp knowledge and be familiar with the tools.
Let's get started!
Artist: Ismael Rac
Scrapkit: Christmas Joy by Niqui's Designs
Mask: 102 by me HERE
Font: Plaster of Paris
*open your mask and minimize in your workspace*
c/p = copy and paste, ds = drop shadow
File - New - 700x700 - flood fill w white
Open 19 - resize by 50% - c/p as new layer
Click inside your frame w magic wand - expand by 5 - new layer
Open paper1 - c/p into selection - deselect
Move paper under frame
Apply Lokas 3D Shadow to your frame
Blur: 25 Transparency: 70
Angle X: 0 Angle Y: 0 Angle Z: 0
Zoom: 100 Offset X: 5 Offset Y: 5
Perspective: 40 Color: Black
Hit Okay
Open tube - resize to liking - c/p as new layer
Xero - radiance - change beauty to 121 - hit ok
Open 59 - resize by 50 % 2x - sharpen - place to left - ds
Open 22 - resize by 50 % 2x - sharpen - place to bottom right - ds
Open 38 - resize by 50 % 2x - sharpen - place to bottom - ds
Open 42 - resize by 50 % 2x - sharpen - place to bottom left - ds
Open 40 - resize by 50 % 2x - sharpen - place to bottom left - ds
Duplicate - mirror
Open 56 - resize by 50 % 2x - sharpen - place to bottom left - ds
Open 57 - resize by 50 % 2x - sharpen - place to bottom left - ds
Open 54 - resize by 50 % 2x - sharpen - place to bottom right - ds
Open 64 - resize by 50 % 2x - sharpen - place to bottom - ds
Open 61 - resize by 50 % 2x - sharpen - place to bottom right - ds
On background layer
Click on background with magic wand - new layer
Open paper8 - c/p into selection - deselect
Layers - New mask layer - From Image
Find your mask in source window - hit ok
Merge group
Resize mask by 85% - change opacity to 53
Open 49 - resize by 85% - c/p as new layer
Open 48 - resize by 50% - place to right - ds
Duplicate - mirror
Delete background - merge visible
Adjust - Brightness and Contrast - Fill Light/ Clarity
Fill Light 41 Clarity 45
Hit ok
Add credits and name
Monday, November 10, 2014

*click on image to view full size*
PTU Count Our Blessings
This tutorial was written by me on November 10, 2014.
It was made out of my own creation and any similarity is purely coincidental.
I used pspx6 but any version should work without problems.
If you're doing this tutorial you must have good psp knowledge and be familiar with the tools.
Let's get started!
Artist: Naughty Pilgrim by Ismael Rac
Scrapkit: We Give Thanks by Karras Kreative Korner
Mask: 19 by moonbeams and spiderwebs
Font: Perpetua Tiling MT
*open your mask and minimize in your workspace*
c/p = copy and paste, ds = drop shadow (I'm using V5, H5, Opacity 50, Blur 10, black)
File - New - 700x700 - flood fill w white
Click on background with magic wand - new layer
Open paper of choice - c/p into selection - deselect
Layers - New mask layer - From Image
Find your mask in source window - hit ok
Merge group
Resize your mask by 65% place to right
Duplicate - mirror - merge down
Open place card - resize by 50% - place to the left - ds
Open leaves 2 - resize by 75% - place to the right - ds
Open basket - place to the bottom - ds
Open pumpkin - resize by 50% - place to bottom and right some - ds
Open ribbon 2 - place to right - ds
Open flower6 - resize by 50% 2x - sharpen - place to bottom right - ds
Duplicate flower6 - mirror - move up some
Open half tube - c/p as new layer - move to left some
Xero - radiance - change beauty to 76 - hit ok
Add drop shadow to your tube
Open turkey - resize by 50% 2x - sharpen - place to bottom - ds
Open cornucopia - resize by 50% - place to bottom left - ds
Open pinecones - resize by 50% 2x - sharpen - place to bottom - ds
Open gravy - resize by 50% 2x - sharpen - place to bottom - ds
Open cranberry sauce - resize by 50% 2x - sharpen - place to bottom - ds
Open flower 3 - resize by 50% 2x - sharpen - place to bottom - ds
Open wordart2 - c/p and place to bottom right
Selections - Select all - float - defloat - modify - expand by 2 - new layer
Fill new layer w cream from your tag or another light color
Move fill layer under wordart - deselect
Merge wordart down to fill and add dropshadow
Delete background layer - merge visible
Add credits and name
Sunday, October 12, 2014

*click on image to view full size*
PTU Splash of Autumn
This tutorial was written by me on October 12, 2014.
It was made out of my own creation and any similarity is purely coincidental.
I used pspx6 but any version should work without problems.
If you're doing this tutorial you must have good psp knowledge and be familiar with the tools.
Let's get started!
Artist: Cute Sweater SL by Ismael Rac
Scrapkit: Bright Autumn Crisp by Drama Bomb Designs
Mask: DBV 113 HERE
Plugins: Xero - Radiance
Font: TheNautiGal
*open your mask and minimize in your workspace*
c/p = copy and paste, ds = drop shadow (I'm using V5, H5, Opacity 50, Blur 10, black)
File - New - 700x700 - flood fill w white
Click on background with magic wand - new layer
Open paper5 - c/p into selection - deselect
Layers - New mask layer - From Image
Find your mask in source window - hit ok
Merge group
Open 34 - resize by 85% - c/p as new layer
Click inside your frame w magic wand - expand by 5 - new layer
Open paper10 - c/p into selection - deselect
Move paper under frame
Add drop shadow to your frame
Open 83 - c/p as new layer - ds
Open 69 - c/p as new layer - ds
Open 4 - resize by 50% 2x - sharpen - place to right - ds
Open 84 - place to left - ds
Open 110 - place to bottom - ds
Open 106 - c/p as new layer - ds
Open 3 - resize by 50% 2x - sharpen - place to bottom right - ds
Open 90 - mirror - place to left - ds
Open tube - resize to fit tag - c/p as new layer
Xero - radiance - change beauty to 109 - hit ok
Drop shadow on tube
Open 81 - resize by 50% 2x - sharpen - place to bottom right - ds
Open 82 - resize by 50% 2x - sharpen - place to bottom right - ds
Open 107 - resize by 50% 2x - sharpen - place to bottom left - ds
Open 88 - resize by 50% 2x - sharpen - place to bottom - ds
Open 55 - resize by 50% 2x - sharpen - place to bottom left - ds
Open 46 - resize by 50% 2x - sharpen - place to bottom - ds
From top to bottom go thru all the elements and add this additional ds w these settings:
V -3, H 5, Opacity 50, B 10, black
Delete background - merge visible
Adjust - Brightness and Contrast
Local Tone Mapping - strength 4.0 - Block Size 35 - hit ok
Add credits and name

SPECIAL BUY 10-11-14 TO 10-12-14
Get the 2009-2013 Cute Sweater Revamp SL. (13 Layers) FREE with a $2.00 Purchase . Just pop it in your cart at check out. No GC's accepted as a form of payment.
Get the 2009-2013 Cute Sweater Revamp SL. (13 Layers) FREE with a $2.00 Purchase . Just pop it in your cart at check out. No GC's accepted as a form of payment.
Friday, October 10, 2014
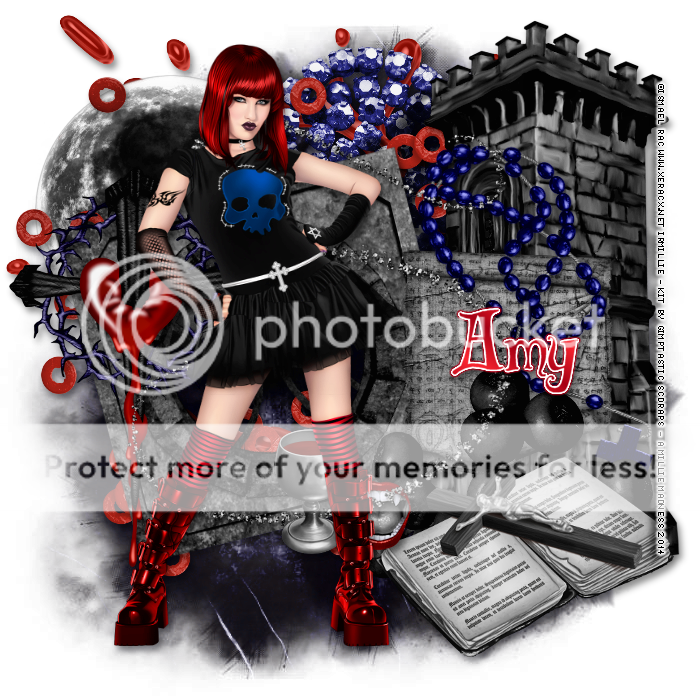
*click on image to view full size*
PTU Let The Darkness Call
This tutorial was written by me on October 10, 2014.
It was made out of my own creation and any similarity is purely coincidental.
I used pspx6 but any version should work without problems.
If you're doing this tutorial you must have good psp knowledge and be familiar with the tools.
Let's get started!
Artist: Goth Abby Fairy by Ismael Rac
Scrapkit: Darkness Calls by Gimptastic Scraps
Mask: 54 by me HERE
Font: Biblioteque
*open your mask and minimize in your workspace*
c/p = copy and paste, ds = drop shadow
File - New - 700x700 - flood fill w white
Click on background with magic wand - new layer
Open paper6 - c/p into selection - deselect
Layers - New mask layer - From Image
Find your mask in source window - hit ok
Merge group
Duplicate mask - change blend mode to multiply - merge down
Open splatter - place to top left - ds
Open moon - place to top left - ds
Open deco 2 - place to top - ds
Open cloud - resize by 85% - place to right - duplicate - mirror
Open scatter - c/p as new layer
Open window - rotate to the left - move left - ds
Open cross - place to left - ds
Open tower - place to right - ds
Open paper - resize by 75% - place to right - ds
Open rosary - place to right - ds
Open berries - place to bottom right - ds
Open bible and crucafix - place to bottom right - ds
Open vamp mouth - resize by 50% 2x - sharpen - place to bottom - ds
Open glitter - resize by 75% - c/p as new layer
Open tube - resize to fit your tag - place to right some
Xero - radiance - change beauty to 100 - hit ok
Drop shadow your tube
Delete background - merge visible
Add credits and name
Thursday, October 9, 2014

*click on image to view full size*
PTU Pretty In Fall
This tutorial was written by me on October 9, 2014.
It was made out of my own creation and any similarity is purely coincidental.
I used pspx6 but any version should work without problems.
If you're doing this tutorial you must have good psp knowledge and be familiar with the tools.
Let's get started!
Artist: 2014 Cool N Pretty by Ismael Rac (COMING SOON)
Scrapkit: Cool N Pretty kit made to match by Niqui's Designs
Mask: 25 by me HERE
Font: Rage Italic
*open your mask and minimize in your workspace*
c/p = copy and paste, ds = drop shadow
File - New - 700x700 - flood fill w white
Open 26 - resize by 50% - c/p as new layer
Open tube - place face so its inside frame
Move under frame
Click inside frame w magic wand - expand by 5 - new layer
Open pp2 - c/p into selection - move paper under tube
On tube layer - invert - delete - deselect
Xero - Radiance - change beauty to 97 - hit ok
Add drop shadow to your tube
On frame apply Lokas 3D Shadow w following settings:
Blur: 25 Transparency: 70
Angle X: 0 Angle Y: 0 Angle Z: 0
Zoom: 100 Offset X: 5 Offset Y: 5
Perspective: 40 Color: Black
Hit Okay
Apply Lokas 3D shadow again
Close background layer - merge visible
Move merged to the left
Rotate left some
Open 14 - resize by 50% 2x - sharpen - place to bottom right - ds
Open 22 - resize by 50% 3x - sharpen - place to bottom right - ds
Open 19 - resize by 50% - place to bottom left - ds
Open 30 - resize by 50% 2x - sharpen - place to bottom - ds
Open 25 - resize by 50% 2x - sharpen - place to top left - ds
Open 24 - resize by 50% 2x - sharpen - place to top - ds
Open tube - resize to liking to fit your tag - place to right
Xero - radiance with same settings as above
Drop shadow on tube
On background layer
Click on background with magic wand - new layer
Open paper of choice - c/p into selection - deselect
Layers - New mask layer - From Image
Find your mask in source window - hit ok
Merge group
Duplicate mask - change blend to multiply
Open 16 - place to top - ds
Duplicate - flip and mirror
Open 17 - resize by 50% - place to the left - ds
Open 18 - resize by 50% - place to left - ds
Open 27 - place to top and left some - ds
Duplicate 27 - resize by 50% - flip - move to bottom left
Delete background layer - merge visible
Adjust - Brightness and Contrast
Local Tone Mapping - strength 4.0 - Block Size 35 - hit ok
Add credits and name
Friday, September 26, 2014

*click on image to view full size*
PTU Under My Spell
This tutorial was written by me on September 20, 2014.
It was made out of my own creation and any similarity is purely coincidental.
I used pspx6 but any version should work without problems.
If you're doing this tutorial you must have good psp knowledge and be familiar with the tools.
Let's get started!
Artist: 2009-2014 Trick Or Treat SL by Ismael Rac
Scrapkit: Enchantment by Scrappin' With Lil Ole Me
Mask: 50 by me HERE
Plugins: Xero - Radiance
Font: AL Libretto
*open your mask and minimize in your workspace*
c/p = copy and paste, ds = drop shadow
File - New - 700x700 - flood fill w white
Click on background with magic wand - new layer
Open paper18 - c/p into selection - deselect
Layers - New mask layer - From Image
Find your mask in source window - hit ok
Merge group
Duplicate mask - change blend to screen
Open 123 - place to left - ds
Open 3 - place to right and down some - ds
Open 73 - resize by 50% - place to right - ds
Open 117 - resize by 50% - place to left - rotate - ds
Open 86 - resize by 50% - place to left - ds
Open 85 - place to right some - ds
Open 53 - place to the bottom - ds
Open 37 - resize by 50% - place to bottom right - ds
Open 61 - resize by 50% - place to right - ds
Open tube - copy half tube and paste as new layer - place to left some
Xero - radiance - change beauty to 100 - hit ok
Add drop shadow to your tube
Open 27 - resize by 50% - place to bottom - ds
Open 105 - resize it by 50% 2x - sharpen - place to bottom - ds
Open 96 - resize by 50% 2x - sharpen bottom - ds
Open 30 - resize by 50% 2x - sharpen - place to bottom left - ds
Delete background - merge visible
Adjust - Brightness and Contrast
Local Tone Mapping - strength 4.0 - Block Size 35 - hit ok
Add credits and name

**SPECIAL BUY 9-25-14 TO 9-26-14 **
http://store.xeracx.net/Get the 2014 Trick or Treat HD SL Special Layers (9) Plus Customizable Item Layers. FREE with a $2.00 Purchase . Just pop it in your cart at check out. No GC's accepted as a form of payment.
2014 Trick or Treat HD SL Contest From Now 9-25-14 to 9-28-14 Post your tag(s) in the Fan group only Using the 2014 Trick or Treat HD SL Winner will get a Xclusive Layer
Subscribe to:
Posts
(Atom)
MY BLINKIE

