Showing posts with label Alfadesire. Show all posts
Showing posts with label Alfadesire. Show all posts
Monday, December 8, 2014
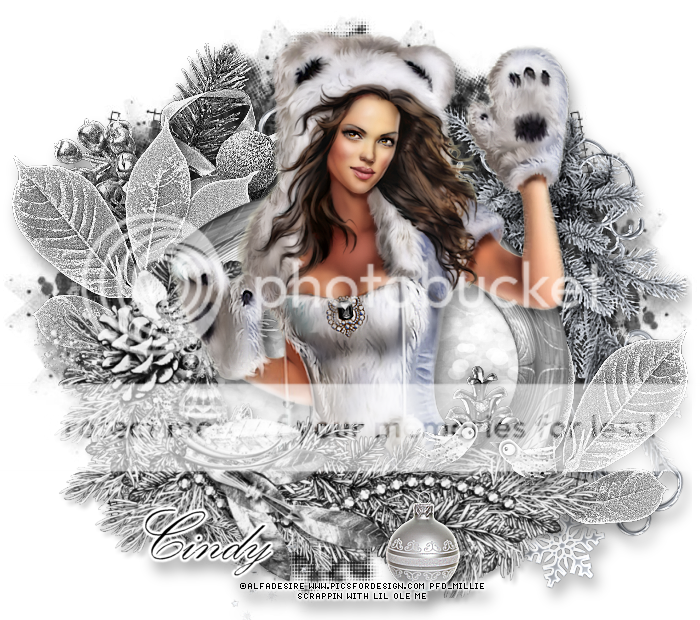
*click on image to view full size*
PTU Silver Love
This tutorial was written by me on December 8, 2014.
It was made out of my own creation and any similarity is purely coincidental.
I used pspx6 but any version should work without problems.
If you're doing this tutorial you must have good psp knowledge and be familiar with the tools.
Let's get started!
Artist: Bear by Alfadesire
Scrapkit: Silver Wings by Scrappin With Lil Ole Me
Mask: 103 by Me HERE
Font: Kunstler Script
*open your mask and minimize in your workspace*
c/p = copy and paste, ds = drop shadow
File - New - 700x700 - flood fill w white
Open 2 - resize by 80% - place to bottom
Click inside your frame w magic wand - expand by 5 - new layer
Open paper19 - c/p into selection - deselect
Move paper under frame
On frame - add drop shadow
Open tube - resize to liking - c/p as new layer - move to bottom
(when I copied my tube i only selected half of it with my selection tool)
Xero - porcelain - change blue channel to 0 - hit ok
Add drop shadow to your tube
Open 95 - resize by 50% 2x - sharpen - place to right - ds
Duplicate 2 - move so its the top layer
With your selection tool draw a rectangle on top portion of frame
Then delete
Open 140 - resize by 50% 2x - place to bottom right - ds
Open 38 - resize by 50% 2x - place to bottom - ds
On background layer
Click on background with magic wand - new layer
Open paper1 - c/p into selection - deselect
Layers - New mask layer - From Image
Find your mask in source window - hit ok
Merge group
Duplicate mask and change blend mode to multiply
Open 30 - resize by 80% - place to top right - ds
Open 96 - resize by 50% - place to top left - ds
Open 65 - resize by 50% - place to top left - ds
Duplicate - mirror - move to bottom
Delete background layer - merge visible
Adjust - Brightness and Contrast
Local Tone Mapping - strength 4.0 - Block Size 35 - hit ok
Add credits and name
Saturday, November 1, 2014

*click on image to view full size*
PTU Winter Glow
This tutorial was written by me on November 1, 2014.
It was made out of my own creation and any similarity is purely coincidental.
I used pspx6 but any version should work without problems.
If you're doing this tutorial you must have good psp knowledge and be familiar with the tools.
Let's get started!
Artist: Winter by Alfadesire
Scrapkit: Joyeux Noel by Scrappin With Lil Ole Me
Mask: 84 by WSL
Font: Perpetual Tiling
*open your mask and minimize in your workspace*
c/p = copy and paste, ds = drop shadow (I'm using V5, H5, Opacity 50, Blur 10, black)
File - New - 700x700 - flood fill w white
Open 47 - resize by 75% - c/p as new layer
With freehand tool draw rectangle around frame - new layer
Open pp2 - c/p into selection - move under frame layer - new layer
Open 129 - c/p into selection - deselect - ds
Add drop shadow to your frame
Open 74 - resize by 50% - place to bottom
Open 115 - resize by 50% -2x - sharpen - place to bottom left - ds
Open 42 - resize by 50% -2x - sharpen - place to bottom left - ds
Open 130 - resize by 50% -2x - sharpen - place to bottom right - ds
Open 40 - resize by 50% -2x - sharpen - place to bottom right - ds
Open 39 - resize by 50% -2x - sharpen - place to bottom - ds
Open tube - resize by 65% - place to left - ds
On background layer
Click on background with magic wand - new layer
Open paper14 - c/p into selection - deselect
Layers - New mask layer - From Image
Find your mask in source window - hit ok
Merge group
Move mask to left - duplicate - mirror - merge down
Open 49 - resize by 85% - place to bottom
Open 122 - resize by 85% - place to right - ds
Open 23 - place to left - ds
Open 81 - resize by 70% - place to left - ds
Open 36 - resize by 40% - place to bottom left - ds
Open 22 - c/p as new layer
Delete background layer - merge visible
Adjust - Brightness and Contrast
Local Tone Mapping - strength 4.0 - Block Size 35 - hit ok
Add credits and name
Subscribe to:
Posts
(Atom)
MY BLINKIE

