Showing posts with label Halloween. Show all posts
Showing posts with label Halloween. Show all posts
Sunday, October 19, 2014
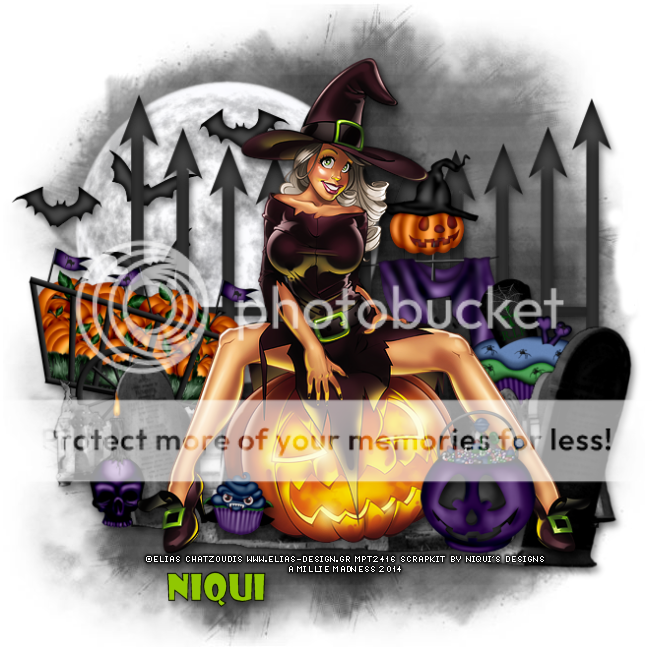
*click on image to view full size*
PTU Make You Say Boo!
This tutorial was written by me on October 19, 2014.
It was made out of my own creation and any similarity is purely coincidental.
I used pspx6 but any version should work without problems.
If you're doing this tutorial you must have good psp knowledge and be familiar with the tools.
Let's get started!
Artist: Elias Chatzoudis
Scrapkit: Boo by Niqui's Designs
Mask: 54 by me HERE
Plugins: Xero - Radiance
Font: Showcard Gothic
*open your mask and minimize in your workspace*
c/p = copy and paste, ds = drop shadow (I'm using V5, H5, Opacity 50, Blur 10, black)
File - New - 700x700 - flood fill w white
Click on background with magic wand - new layer
Open paper of choice - c/p into selection - deselect
Layers - New mask layer - From Image
Find your mask in source window - hit ok
Merge group
Open 3 - resize by 80% - place to top left - ds
Open 60 - resize by 50% - place to top left - ds
Open 44 - resize by 50% - c/p as new layer - move down some - ds
Open 47 - resize by 50% - mirror - place to the left - ds
Open 9 - resize by 50% - place to the right - ds
Open 22 - resize by 50% 2x - sharpen - place to right - ds
Open 1 - resize by 85% - place to the bottom - ds
Open 24 - resize by 50% 2x - sharpen - place to bottom left - ds
Open tube - c/p as new layer - place so its in the middle
Xero - radiance - change beauty to 112 - hit ok
Add drop shadow to your tube
Open 43 - resize by 50% 3x - sharpen - place to bottom - ds
Open 23 - resize by 50% 2x - sharpen - place to bottom right - ds
Delete background - merge visible
Crop tag to your liking
Add credits and name
Saturday, October 18, 2014

*click on image to view full size*
PTU This is Halloween
This tutorial was written by me on October 18, 2014.
It was made out of my own creation and any similarity is purely coincidental.
I used pspx6 but any version should work without problems.
If you're doing this tutorial you must have good psp knowledge and be familiar with the tools.
Let's get started!
Artist: Witch 2 by Jose Cano
Scrapkit: This is Halloween by Irish Princess Designs
Mask: 54 by me HERE
Font: 13th Ghostwrite
*open your mask and minimize in your workspace*
c/p = copy and paste, ds = drop shadow (I'm using V5, H5, Opacity 50, Blur 10, black)
File - New - 700x700 - flood fill w white
Click on background with magic wand - new layer
Open paper7 - c/p into selection - deselect
Layers - New mask layer - From Image
Find your mask in source window - hit ok
Merge group
Open 85 - place to right
Duplicate 85 - mirror
Open 76 - resize by 50% 2x - sharpen - place to left - ds
Open 67 - place to right - ds
Open 37 - c/p as new layer - ds
Open 19 - resize by 50% - place to left - ds
Open 73 - resize by 50% - place to bottom - ds
Open 17 - resize by 50% - place to bottom left - ds
Duplicate 17 - mirror
Open 89 - place to bottom - ds
Open 95 - resize by 50% 2x - sharpen - place to bottom left - ds
Open 75 - resize by 50% - place to right - ds
Open 38 - resize by 50% - place to bottom right - ds
Open tube - resize to liking - c/p as new layer
Drop shadow tube
Open 88 - resize by 50% - place to bottom
Open 87 - resize by 50% 3x - sharpen - place to bottom right - ds
Open 83 - resize by 50% 2x - sharpen - place to bottom right - ds
Open 62 - resize by 50% 3x - sharpen - place to bottom left - ds
Delete background layer - merge visible
Adjust - Brightness and Contrast
Local Tone Mapping - strength 4.0 - Block Size 35 - hit ok
Add credits and name
Wednesday, October 15, 2014

*click on image to view full size*
PTU Fun With Skulls
This tutorial was written by me on October 15, 2014.
It was made out of my own creation and any similarity is purely coincidental.
I used pspx6 but any version should work without problems.
If you're doing this tutorial you must have good psp knowledge and be familiar with the tools.
Let's get started!
Artist: Elias Chatzoudis
Scrapkit: Skellafun by Gimptastic Scraps
Mask: DBV 113
Font: Ravie
*open your mask and minimize in your workspace*
c/p = copy and paste, ds = drop shadow (I'm using V5, H5, Opacity 50, Blur 10, black)
File - New - 700x700 - flood fill w white
Open frame 4 - resize by 75% - c/p as new layer
Click inside frame - expand by 5 - new layer
Open pp7 - c/p into selection - deselect
Move pp7 under frame
Add drop shadow to your frame 2x - merge down to paper
Open hand - place to right - ds
Open hoodie - place to left - ds
Open tube - c/p as new layer
Xero - porcelain - change blue channel to 0 - hit ok
Drop shadow tube
Open stars - resize by 50% - place to bottom left - ds
Open skullrose - resize by 50% - place to bottom - ds
Open voodoo doll - resize by 50% - place to right - ds
Open potion - resize by 50% - place to bottom - ds
Open skate skull - resize by 50% - place to bottom - ds
Open scarf - resize by 50% - place to right - ds
Open radio - resize by 50% 2x - place to bottom - ds
On background layer
Click on background with magic wand - new layer
Open paper of choice - c/p into selection - deselect
Layers - New mask layer - From Image
Find your mask in source window - hit ok
Merge group
Open glitter dots - place to bottom - ds
Open glitter - place to left - ds
Open star scatter - resize by 50% - place to left - ds
Open scatter - c/p as new layer - ds
Delete background layer - merge visible
Add credits and name
Saturday, October 4, 2014
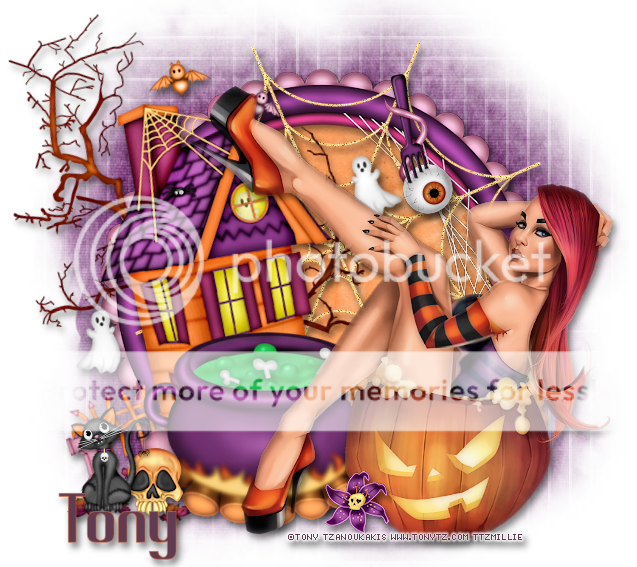
*click on image to view full size*
FTU Halloween Time
This tutorial was written by me on October 4, 2014.
It was made out of my own creation and any similarity is purely coincidental.
I used pspx6 but any version should work without problems.
If you're doing this tutorial you must have good psp knowledge and be familiar with the tools.
Let's get started!
Artist: Pumpkin Bath by Tony Tzanoukakis
Scrapkit: Halloweenaholic by Designs by LK
Mask: 17 by me HERE
Plugin: Xero - Porcelain
Font: Poole
*open your mask and minimize in your workspace*
c/p = copy and paste, ds = drop shadow
File - New - 700x700 - flood fill w white
Click on background with magic wand - new layer
Open paper9 - c/p into selection - deselect
Layers - New mask layer - From Image
Find your mask in source window - hit ok
Merge group
Open frame 1 - resize by 80% - c/p as new layer
With freehand tool draw around the frame - new layer
Open paper of choice and c/p into selection - deselect
Move paper under frame
Add drop shadow to frame
Open haunted house - place to left - rotate left some - ds
Open eyeball1 - resize by 50% - place to top right - ds
Open cauldron - resize by 70% - place to bottom - ds
Open skull 1 - resize by 50% - place to bottom left - ds
Open kitty - resize by 50% - place to bottom left - ds
Open tube - resize to liking - c/p as new layer - move to left
Xero - porcelain - change blue channel to 0 - hit ok
Add drop shadow to your tube
Open flower 3 - resize by 50% 2x - sharpen - place to bottom - ds
Delete background layer - merge visible
Adjust - Brightness and Contrast
Local Tone Mapping - strength 4.0 - Block Size 35 - hit ok
Crop tag to your liking
Add credits and name
Friday, September 26, 2014

*click on image to view full size*
PTU Under My Spell
This tutorial was written by me on September 20, 2014.
It was made out of my own creation and any similarity is purely coincidental.
I used pspx6 but any version should work without problems.
If you're doing this tutorial you must have good psp knowledge and be familiar with the tools.
Let's get started!
Artist: 2009-2014 Trick Or Treat SL by Ismael Rac
Scrapkit: Enchantment by Scrappin' With Lil Ole Me
Mask: 50 by me HERE
Plugins: Xero - Radiance
Font: AL Libretto
*open your mask and minimize in your workspace*
c/p = copy and paste, ds = drop shadow
File - New - 700x700 - flood fill w white
Click on background with magic wand - new layer
Open paper18 - c/p into selection - deselect
Layers - New mask layer - From Image
Find your mask in source window - hit ok
Merge group
Duplicate mask - change blend to screen
Open 123 - place to left - ds
Open 3 - place to right and down some - ds
Open 73 - resize by 50% - place to right - ds
Open 117 - resize by 50% - place to left - rotate - ds
Open 86 - resize by 50% - place to left - ds
Open 85 - place to right some - ds
Open 53 - place to the bottom - ds
Open 37 - resize by 50% - place to bottom right - ds
Open 61 - resize by 50% - place to right - ds
Open tube - copy half tube and paste as new layer - place to left some
Xero - radiance - change beauty to 100 - hit ok
Add drop shadow to your tube
Open 27 - resize by 50% - place to bottom - ds
Open 105 - resize it by 50% 2x - sharpen - place to bottom - ds
Open 96 - resize by 50% 2x - sharpen bottom - ds
Open 30 - resize by 50% 2x - sharpen - place to bottom left - ds
Delete background - merge visible
Adjust - Brightness and Contrast
Local Tone Mapping - strength 4.0 - Block Size 35 - hit ok
Add credits and name

**SPECIAL BUY 9-25-14 TO 9-26-14 **
http://store.xeracx.net/Get the 2014 Trick or Treat HD SL Special Layers (9) Plus Customizable Item Layers. FREE with a $2.00 Purchase . Just pop it in your cart at check out. No GC's accepted as a form of payment.
2014 Trick or Treat HD SL Contest From Now 9-25-14 to 9-28-14 Post your tag(s) in the Fan group only Using the 2014 Trick or Treat HD SL Winner will get a Xclusive Layer
Thursday, September 25, 2014

*click on image to view full size*
PTU Gothika
This tutorial was written by me on September 25, 2014.
It was made out of my own creation and any similarity is purely coincidental.
I used pspx6 but any version should work without problems.
If you're doing this tutorial you must have good psp knowledge and be familiar with the tools.
Let's get started!
Artist: Manya by Lady Mishka
Scrapkit: Gothica Kit by Niqui's Designs
Mask: 28 by me HERE
Font: Clarendon Condensed
*open your mask and minimize in your workspace*
c/p = copy and paste, ds = drop shadow
File - New - 700x700 - flood fill w white
Open 23 - resize by 70% - c/p as new layer
Click inside your frame w magic wand - expand by 5 - new layer
Open paper3 - c/p into selection - deselect
Move paper under frame
Open 43 - place to bottom and move to the right some - ds
Open 38 - resize by 50% 2x - sharpen - place to the bottom left - ds
Open 31 - resize by 50% 2x - sharpen - place to the bottom left - ds
Open 17 - resize by 70% - place to bottom and move left some - ds
Open 8 - resize by 50% 2x - sharpen - place to the bottom left - ds
Open 7 - resize by 50% 2x - sharpen - place to the top left - ds
Open 3 - resize by 50% 2x - sharpen - place to the bottom left - ds
Open tube - resize to liking and place to bottom right
Add drop shadow to your tube
On background layer
Click on background with magic wand - new layer
Open paper7 - c/p into selection - deselect
Layers - New mask layer - From Image
Find your mask in source window - hit ok
Merge group
Open 54 - c/p as new layer - rotate to right
Place to bottom right - ds
Open 65 - c/p as new layer
Duplicate 65 - change blend mode to multiply
Open 33 - resize by 50% - place to left - ds
Open 18 - resize by 50% - place to bottom right - ds
Duplicate 18 - mirror
Delete background - merge visible
Add credits and name
Wednesday, September 17, 2014
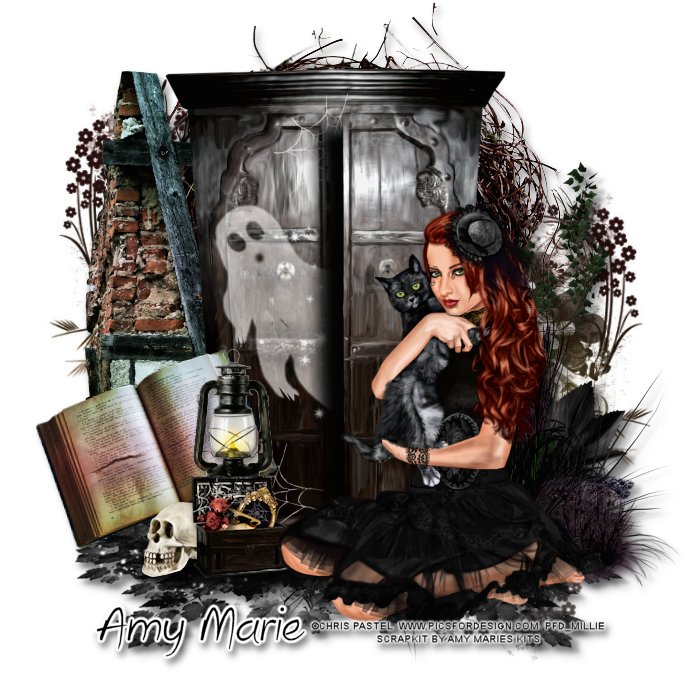
*click on image to view full size*
PTU Eerie Nights Up Ahead
This tutorial was written by me on September 17, 2014.
It was made out of my own creation and any similarity is purely coincidental.
I used pspx6 but any version should work without problems.
If you're doing this tutorial you must have good psp knowledge and be familiar with the tools.
Let's get started!
Artist: Gothika by Chris Pastel
Scrapkit: Eerie Nights by Amy Marie's Kits
Mask: 38 by me HERE
Font: Eamon
*open your mask and minimize in your workspace*
c/p = copy and paste, ds = drop shadow
File - New - 700x700 - flood fill w white
Click on background with magic wand - new layer
Open paper1 - c/p into selection - deselect
Layers - New mask layer - From Image
Find your mask in source window - hit ok
Merge group
Move mask to right - duplicate - change blend to multiply
Merge down - duplicate - mirror and move to top and left some
Open 54 - place to top and right some - ds
Open 48 - place to left - ds
Open 116 - place to bottom - ds
Open 97 - place to bottom - ds
Open 94 - c/p as new layer - ds
Open 38 - resize by 50% - place to left - ds
Open 99 - resize by 50% 2x - sharpen - bottom left - ds
Open 100 - resize by 50% - place to left - ds
Open 93 - resize by 50% 2x - sharpen - place to bottom left - ds
Open tube - resize to liking - add drop shadow
Delete background and merge visible
Adjust - Brightness and Contrast
Local Tone Mapping - strength 4.0 - Block Size 35 - hit ok
Add credits and name
Thursday, September 11, 2014
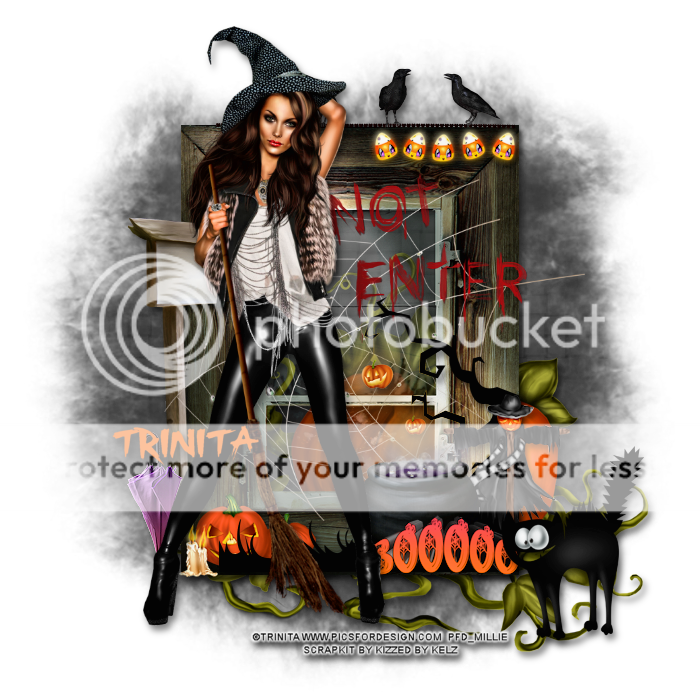
*click on image to view full size*
PTU Its Witch-o-Ween
This tutorial was written by me on September 11, 2014.
It was made out of my own creation and any similarity is purely coincidental.
I used pspx6 but any version should work without problems.
If you're doing this tutorial you must have good psp knowledge and be familiar with the tools.
Let's get started!
Artist: Sexy Witch by Trinita
Scrapkit: Witch-o-Ween by Kizzed by Kelz
Mask: DBV mask 111
Font: Broken
*open your mask and minimize in your workspace*
c/p = copy and paste, ds = drop shadow
File - New - 700x700 - flood fill w white
Click on background with magic wand - new layer
Open paper21 - c/p into selection - deselect
Layers - New mask layer - From Image
Find your mask in source window - hit ok
Merge group
Open 24 - place to bottom and move to the right some - ds
Open 103 - resize by 75% - c/p as new layer - ds
Open 112 - resize by 50% - place to left - ds
Open 104 - c/p as new layer
Open 64 - place to bottom left - ds
Open 58 - resize by 50% - c/p as new layer - move up some - ds
Open 30 - resize by 50% 2x sharpen - place to bottom left - ds
Open 32 - resize by 50% - place to top right - ds
Open 90 - resize by 50% - place to bottom right - ds
Open 40 - resize by 50% 2x sharpen - place to bottom right - ds
Open 96 - resize by 50% 2x sharpen - place to bottom right - ds
Open 128 - resize by 50% 2x sharpen - place to bottom right - ds
Open 85 - resize by 50% - place to bottom right - ds
Open 129 - resize by 50% 2x sharpen - place to top right - ds
Open tube - resize to liking - place to left - ds
Delete background - merge visible
Add credits and name
Friday, September 5, 2014

*click on image to view full size*
PTU The Cute Witch
This tutorial was written by me on September 6, 2014.
It was made out of my own creation and any similarity is purely coincidental.
I used pspx6 but any version should work without problems.
If you're doing this tutorial you must have good psp knowledge and be familiar with the tools.
Let's get started!
Artist: Linsey Witch by Lady Mishka
Scrapkit: Witching Hour by Hania's Designs
Mask: 85 by me HERE
Font: Aktuelle
*open your mask and minimize in your workspace*
c/p = copy and paste, ds = drop shadow
File - New - 700x700 - flood fill w white
Open 93 - resize by 60% - c/p as new layer
Click inside your frame w magic wand - expand by 5 - new layer
Open paper10 - c/p into selection - deselect
Move paper under frame
Add drop shadow to frame
Open 91 - resize by 60% - c/p as new layer - ds
Open 59 - resize by 50% - top left - ds
Open 51 - place to top right - ds
Open 50 - place to the right - ds - mirror
Open 78 - resize by 50% 2x - sharpen - place to bottom right - duplicate - mirror
Oepn 72 - resize by 70% - place to bottom - ds
Open 77 - resize by 50% 2x - sharpen - place to the bottom left - ds
Open 82 - resize by 50% 2x - sharpen - place to bottom right - ds
Open tube - resize to liking - c/p as new layer - move right some
Add some drop shadow
On background layer
Click on background with magic wand - new layer
Open paper1 - c/p into selection - deselect
Layers - New mask layer - From Image
Find your mask in source window - hit ok
Merge group
Duplicate mask and change blend to multiply
Open 63 - place to top right
Open 56 - place to right - duplicate - mirror
Delete background layer - merge visible
Add credits and name
Subscribe to:
Posts
(Atom)
MY BLINKIE

