Showing posts with label Jose Cano. Show all posts
Showing posts with label Jose Cano. Show all posts
Thursday, April 30, 2015

*click on image to view full size*
PTU Love The Summer
This tutorial was written by me on April 30, 2015.
It was made out of my own creation and any similarity is purely coincidental.
I used pspx6 but any version should work without problems.
If you're doing this tutorial you must have good psp knowledge and be familiar with the tools.
Let's get started!
Artist: Candy by Jose Cano
Scrapkit: Summer Lovin by Scrappin With Lil Ole Me
Mask: 104 by me HERE
Font: Ambiance BT
*open your mask and minimize in your workspace*
c/p = copy and paste, ds = drop shadow
File - New - 700x700 - flood fill w white
Click on background with magic wand - new layer
Open paper25 - c/p into selection - deselect
Layers - New mask layer - From Image
Find your mask in source window - hit ok
Merge group
Open 135 - resize by 50% - place to top left - ds
Open 98 resize by 70% - c/p as new layer
Open tube close up - place under frame
Click inside your frame w magic wand - expand selection by 5
Add a new layer
Open paper1 - c/p into selection
Move paper under tube
On tube layer - invert - delete - deselect
Change blend mode to overlay
Add drop shadow to your frame
Open 95 - place to the left - ds
Open 71 - resize by 50% - place to the left - ds
Duplicate - mirror
Open 46 - resize by 50% 2x - sharpen - place to bottom left - ds
Open 36 - resize by 50% - place to left - ds
Open full tube - resize by 50% - place to the right - ds
Open 92 - resize by 50% 2x - sharpen - place to bottom left - ds
Open 84 - resize by 50% 2x - sharpen - place to bottom - ds
Open 35 - resize by 50% 2x - sharpen - place to bottom - ds
Delete background - merge visible
Add credits and name
Thursday, December 18, 2014

*click on image to view full size*
PTU Magical Holiday
This tutorial was written by me on December 18, 2014.
It was made out of my own creation and any similarity is purely coincidental.
I used pspx6 but any version should work without problems.
If you're doing this tutorial you must have good psp knowledge and be familiar with the tools.
Let's get started!
Artist: Christmas Toon by Jose Cano
Scrapkit: Holiday Magic by Scrappin' With Lil Ole Me
Plugins: Xero - Radiance
Font: Caneletter
*open your mask and minimize in your workspace*
c/p = copy and paste, ds = drop shadow
File - New - 700x700 - flood fill w white
Open 130 - resize by 50% - place to bottom right - ds
Duplicate - mirror
Open 133 - c/p as new layer - ds
Open 142 - resize by 85% - sharpen - c/p as new layer - ds
Open 58 - resize by 75% - c/p as new layer
Click inside your frame w magic wand - expand by 5 - new layer
Open paper2 - c/p into selection - deselect
Move paper under frame
Add drop shadow to your framef
Open 45 - resize by 50% - place to the right - ds
Duplicate - mirror
Open 44 - resize by 50% 2x - sharpen - place to bottom right - ds
Open 42 - resize by 50% - place to bottom right - ds
Duplicate - mirror
Open 78 - resize by 50% - place to bottom right - ds
Open 164 - resize by 50% 2x - sharpen - place to left - ds
Open tube - resize to liking - copy and paste as new layer
Xero - radiance - change beauty to 135 - hit ok
Add drop shadow to tube
Open 128 - resize by 50% 2x - sharpen - place to bottom right - ds
Open 136 - resize by 50% 2x - sharpen - place to bottom right - ds
Duplicate - mirror
Open 87 - resize by 50% - place to bottom - ds
Open 74 - resize by 50% 2x - sharpen - place to bottom - ds
Open 73 - resize by 50% 2x - sharpen - place to bottom - ds
Delete background - merge visible
Adjust - Brightness and Contrast
Local Tone Mapping - strength 4.0 - Block Size 35 - hit ok
Add credits and name
Tuesday, December 9, 2014

*click on image to view full size*
PTU Feeling The Joy
This tutorial was written by me on December 8, 2014.
It was made out of my own creation and any similarity is purely coincidental.
I used pspx6 but any version should work without problems.
If you're doing this tutorial you must have good psp knowledge and be familiar with the tools.
Let's get started!
Artist: Alexia by Jose Cano
Scrapkit: Christmas Joy by Gimptastic Scraps
Mask: 102 by me
Font: Anglia Script
*open your mask and minimize in your workspace*
c/p = copy and paste, ds = drop shadow
File - New - 700x700 - flood fill w white
Click on background with magic wand - new layer
Open paper of choice - c/p into selection - deselect
Layers - New mask layer - From Image
Find your mask in source window - hit ok
Merge group
Duplicate mask - change blend to multiply
Open frame 1 - c/p as new layer - move down some
Click inside your frame w magic wand - expand by 5 - new layer
Open paper9 - c/p into selection - deselect
Move paper under frame
Open branch 3 - place to bottom right - ds - duplicate - mirror
Merge down
Open bauble2 - place to top left - ds
Open frame 6 - rotate to left some
Open tube and place under frame - move tube left and down
so that the face is inside of bottom frame
Duplicate tube - mirror move up some so face is inside right frame
Merge tube down
On merged tube layer apply Xero - porcelain - w default settings - hit ok
Change tube layer to overlay
Click inside frame w magic wand
On tube layer - invert - delete - invert
New layer
Open pp of choice and copy into selection - deselect
Move under tube layer
Add drop shadow to frame 6
Merge tube down to paper and then frame down to tubes
Open jars - place to bottom right - ds
Open flower 1 - place to bottom left - ds
Duplicate - mirror
Open branch 1 - place to the bottom - ds
Open box - resize by 50% - place to bottom left - ds
Open harp - place to right - ds
Open rose - resize by 70% - place to bottom right - ds
Duplicate - mirror
Open tube - resize to liking - c/p as new layer
Xero - porcelain - change blue channel to 0 - hit ok
Open teacup - resize by 50% - place to bottom left - ds
Open gift 1 - resize by 50% - place to bottom - ds
Open gift 3 - resize by 50% - place to bottom - ds
Delete background - merge visible
Adjust - Brightness and Contrast
Local Tone Mapping - strength 4.0 - Block Size 35 - hit ok
Add credits and name
Monday, October 27, 2014

*click on image to view full size*
PTU Happy Autumn
This tutorial was written by me on October 27, 2014.
It was made out of my own creation and any similarity is purely coincidental.
I used pspx6 but any version should work without problems.
If you're doing this tutorial you must have good psp knowledge and be familiar with the tools.
Let's get started!
Artist: Honey by Jose Cano
Scrapkit: Autumn Harvest by Scrappin Krazy Designs
Mask: 72 by me HERE
Font: Shishoni Brush
*open your mask and minimize in your workspace*
c/p = copy and paste, ds = drop shadow (I'm using V5, H5, Opacity 50, Blur 10, black)
File - New - 700x700 - flood fill w white
Open 34 - resize by 70% - c/p as new layer
New layer - draw a rectangle around your frame
Open pp 6 - c/p into selection - deselect
Move paper under your frame
Add drop shadow to your frame
Open 33 - resize by 50% - place to the top left - ds
Open 15 - place to the top - ds
Open 10 - resize by 50% - place to the right - ds
Open 11 - resize by 50% - place to bottom left - ds
Open 66 - place to the right - ds
Open 46 - place to the right - ds
Open tube - resize to fit tag - place to left
Xero - radiance - change beauty to 112 - hit ok
Drop shadow tube
Open 65 - place to bottom - ds
Open 56 - resize by 50% - place to bottom right - ds
Open 55 - resize by 50% 2x - sharpen - place to bottom right - ds
Open 45 - resize by 50% - place to the bottom right - ds
On background
Click on background with magic wand - new layer
Open paper12 - c/p into selection - deselect
Layers - New mask layer - From Image
Find your mask in source window - hit ok
Merge group
Open 22 - place to bottom - left - ds
Delete background layer - merge visible
Adjust - Brightness and Contrast
Local Tone Mapping - strength 4.0 - Block Size 35 - hit ok
Add credits and name
Saturday, October 18, 2014
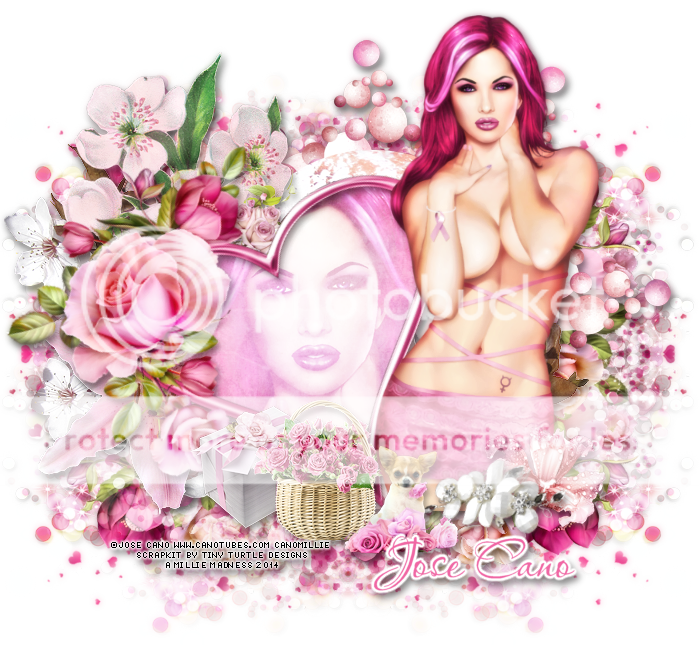
*click on image to view full size*
FTU Let's Be Aware
This tutorial was written by me on October 18, 2014.
It was made out of my own creation and any similarity is purely coincidental.
I used pspx6 but any version should work without problems.
If you're doing this tutorial you must have good psp knowledge and be familiar with the tools.
Let's get started!
Artist: Pinky by Jose Cano
Scrapkit: BCA 2014 Freebie by Tiny Turtle Designs
Plugins: Xero - Radiance
Font: Aquarelle
*open your mask and minimize in your workspace*
c/p = copy and paste, ds = drop shadow (I'm using V5, H5, Opacity 50, Blur 10, black)
File - New - 700x700 - flood fill w white
Open 121 - place to left
Open tube - place under heart frame
Click inside your frame w magic wand - expand by 5 - new layer
Open paper1 - c/p into selection
Move paper under tube
On tube - invert - delete - deselect
Xero - Radiance - change beauty to 112 - hit ok
ADd drop shadow to your frame
Merge tube down to paper and then merge frame down
Open 37 - resize by 50% 2x - sharpen - place to bottom - ds
Open 9 - resize by 50% 2x - sharpen - place to bottom - ds
Open tube - resize to liking - place to right - ds
Open 92 - resize by 50% 2x - sharpen - place to bottom - ds
Open 44 - resize by 50% 2x - sharpen - place to bottom right - ds
Open 6 - resize by 50% 2x - sharpen - place to bottom - ds
On background layer
Open 114 - place to the bottom left - duplicate - mirror - merge down
Duplicate - flip
Open 91 - place to top right - ds
Open 45 - place to left - ds
Open 2 - resize by 80% - place to left - ds
Open 18 - resize by 50% 2x - sharpen - place to the top - ds
Open 36 - place to bottom left - ds

*click on image to view full size*
PTU This is Halloween
This tutorial was written by me on October 18, 2014.
It was made out of my own creation and any similarity is purely coincidental.
I used pspx6 but any version should work without problems.
If you're doing this tutorial you must have good psp knowledge and be familiar with the tools.
Let's get started!
Artist: Witch 2 by Jose Cano
Scrapkit: This is Halloween by Irish Princess Designs
Mask: 54 by me HERE
Font: 13th Ghostwrite
*open your mask and minimize in your workspace*
c/p = copy and paste, ds = drop shadow (I'm using V5, H5, Opacity 50, Blur 10, black)
File - New - 700x700 - flood fill w white
Click on background with magic wand - new layer
Open paper7 - c/p into selection - deselect
Layers - New mask layer - From Image
Find your mask in source window - hit ok
Merge group
Open 85 - place to right
Duplicate 85 - mirror
Open 76 - resize by 50% 2x - sharpen - place to left - ds
Open 67 - place to right - ds
Open 37 - c/p as new layer - ds
Open 19 - resize by 50% - place to left - ds
Open 73 - resize by 50% - place to bottom - ds
Open 17 - resize by 50% - place to bottom left - ds
Duplicate 17 - mirror
Open 89 - place to bottom - ds
Open 95 - resize by 50% 2x - sharpen - place to bottom left - ds
Open 75 - resize by 50% - place to right - ds
Open 38 - resize by 50% - place to bottom right - ds
Open tube - resize to liking - c/p as new layer
Drop shadow tube
Open 88 - resize by 50% - place to bottom
Open 87 - resize by 50% 3x - sharpen - place to bottom right - ds
Open 83 - resize by 50% 2x - sharpen - place to bottom right - ds
Open 62 - resize by 50% 3x - sharpen - place to bottom left - ds
Delete background layer - merge visible
Adjust - Brightness and Contrast
Local Tone Mapping - strength 4.0 - Block Size 35 - hit ok
Add credits and name
Thursday, October 2, 2014

*click on image to view full size*
PTU Autumn Brings Bliss
This tutorial was written by me on October 2, 2014.
It was made out of my own creation and any similarity is purely coincidental.
I used pspx6 but any version should work without problems.
If you're doing this tutorial you must have good psp knowledge and be familiar with the tools.
Let's get started!
Artist: Autumn Bonus tube by Jose Cano
Scrapkit: Autumn Bliss kit by Scrappin' With Lil Ole Me
Mask: MB and SW mask 23
Plugin: Xero - Radiance
Font: Inspiration
*open your mask and minimize in your workspace*
c/p = copy and paste, ds = drop shadow
File - New - 700x700 - flood fill w white
Open 73 - resize by 50% - c/p as new layer - ds
Open 41 - resize by 50% - place to left - ds
Open 67 - place to right - ds
Open 118 - place to bottom - ds
Open 33 - resize by 50% 2x - sharpen - place to bottom right - ds
Open 107 - resize by 50% - place to bottom -- move right some - ds
Open 28 - resize by 50% 2x - sharpen - place to bottom left - ds
Open 69 - resize by 50% 2x - sharpen - place to right - ds
Open half tube - resize to liking - c/p as new layer
Place to middle
Xero - radiance - change beauty to 94 - hit ok
Add drop shadow to your tube
Open 117 - resize by 50% 2x - sharpen - place to bottom - left some - ds
Open 109 - resize by 50% 2x - sharpen - place to bottom - ds
Open 83 - resize by 50% 2x - sharpen - place to bottom right - ds
Open 72 - resize by 50% 2x - sharpen - place to bottom - ds
On background layer
Click on background with magic wand - new layer
Open paper25 - c/p into selection - deselect
Layers - New mask layer - From Image
Find your mask in source window - hit ok
Merge group
Open 15 - resize by 50% - place to left - ds
Open 23 - place to right - ds
Open 85 - resize by 85% - place to right and down some - ds
Delete background layer - merge visible
Adjust - Brightness and Contrast
Local Tone Mapping - strength 4.0 - Block Size 35 - hit ok
Add credits and name
Subscribe to:
Posts
(Atom)
MY BLINKIE

