Showing posts with label Arthur Crowe. Show all posts
Showing posts with label Arthur Crowe. Show all posts
Sunday, February 15, 2015

*click on image to view full size*
PTU So Sweet
This tutorial was written by me on February 15, 2015.
It was made out of my own creation and any similarity is purely coincidental.
I used pspx6 but any version should work without problems.
If you're doing this tutorial you must have good psp knowledge and be familiar with the tools.
Let's get started!
Artist: Sexy Pop by Arthur Crowe
Scrapkit: Sweet Love Kit by Niqui's Designs
Mask: 19 by Moonbeams and Spiderwebs
Font: any of choice
*open your mask and minimize in your workspace*
c/p = copy and paste, ds = drop shadow
File - New - 700x700 - flood fill w white
Click on background with magic wand - new layer
Open paper17 - c/p into selection - deselect
Layers - New mask layer - From Image
Find your mask in source window - hit ok
Merge group
Open 28 - resize by 70% - c/p as new layer
Click inside your frame w magic wand - expand by 5 - new layer
Open paper of choice - c/p into selection - deselect
Move paper under frame
Open 2 - resize by 50% 2x - sharpen - place to top - ds
Add ds to your frame
Open 35 - resize by 50% - place to bottom left - duplicate - mirror - ds
Open 23 - resize by 50% - place to the left - ds
Open tube - resize to liking - c/p as new layer - mirror - place to right
Add dropshadow to your tube
Open 21 - resize by 50% 2x - sharpen - place to bottom - ds
Open 54 - resize by 50% - place to left - ds
Open 32 - resize by 50% 2x - sharpen - place to top left - ds
Open 53 - resize by 50% 2x - sharpen - place to bottom - ds
Open 70 - resize by 50% 2x - sharpen - place to bottom left - ds
Delete background - merge visible
Adjust - Brightness and Contrast
Local Tone Mapping - strength 4.0 - Block Size 35 - hit ok
Add credits and name
Wednesday, November 19, 2014
*click on image to view full size*
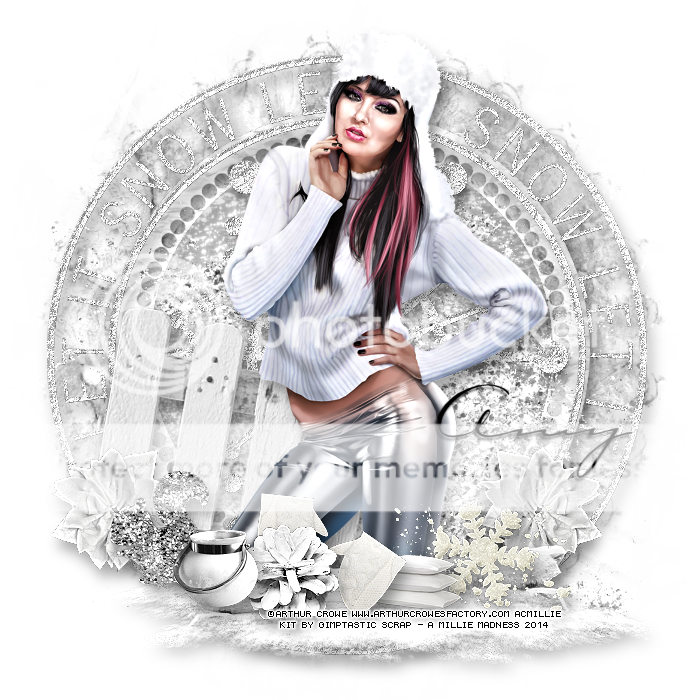
PTU Snow Fantasy
This tutorial was written by me on November 19, 2014.
It was made out of my own creation and any similarity is purely coincidental.
I used pspx6 but any version should work without problems.
If you're doing this tutorial you must have good psp knowledge and be familiar with the tools.
Let's get started!
Artist: Lady Silver by Arthur Crowe
Scrapkit: Winter Wishes by Gimptastic Scraps
Mask: 127 by DBV
Font: Carlotta
*open your mask and minimize in your workspace*
c/p = copy and paste, ds = drop shadow
File - New - 700x700 - flood fill w white
Click on background with magic wand - new layer
Open paper8 - c/p into selection - deselect
Layers - New mask layer - From Image
Find your mask in source window - hit ok
Merge group
Open frame 5 - resize by 80 - c/p as new layer
Click inside your frame w magic wand - expand by 5 - new layer
Open paper5 - c/p into selection - deselect
Move paper under frame
Add drop shadow to your frame
Open deco - c/p as new layer - ds
Open glitter - c/p as new layer - move down some
Open fence - place to left - rotate to right a little bit - ds
Open flower 1 - resize by 50% - place to bottom left - ds
Duplicate - mirror
Open tube - resize to your liking - place to center - ds
Open snowy log - place to bottom right - ds
Open snowflake3 - resize by 50% - place to bottom right - ds
Open pillows - resize by 50% 2x - place to bottom - ds
Open mittens - resize by 50% - place to bottom - ds
Open squirrel - resize by 50% - place to bottom left - ds
Open pinecone - resize by 50% - place to bottom - ds
Open jar - resize by 50% - place to bottom - ds
Delete background layer - merge visible
Adjust - Brightness and Contrast - Fill Light/ Clarity
Fill Light 41 Clarity 45
Hit ok
Add credits and name
Thursday, November 6, 2014

*click on image to view full size*
PTU Let's Give Thanks Tutorial
This tutorial was written by me on November 6, 2014.
It was made out of my own creation and any similarity is purely coincidental.
I used pspx6 but any version should work without problems.
If you're doing this tutorial you must have good psp knowledge and be familiar with the tools.
Let's get started!
Artist: Thankful Bonus by Arthur Crowe
Scrapkit: Give Thanks by Gimptastic Scraps
Plugins: Xero - Radiance
Font: Qamic Sans
*open your mask and minimize in your workspace*
c/p = copy and paste, ds = drop shadow (I'm using V5, H5, Opacity 50, Blur 10, black)
File - New - 700x700 - flood fill w white
Open frame 4 - resize by 80% - c/p as new layer
Click inside your frame w magic wand - expand by 5 - new layer
Open paper5 - c/p into selection - deselect
Move paper under frame
Open heart - place to top right - ds
Open knot - place to left - ds
Open leaf3 - place to left - ds
Open berries - place to right - ds
Open pumpkin - resize by 50% - place to bottom right - ds
Open square brad - resize by 50% - place to left - rotate - ds
Open half tube - resize to liking - c/p as new layer
Xero - radiance - change beauty by 128
Open pilgrim hat - resize by 50% - place to bottom left - ds
Open owl - resize by 50% 2x - place to bottom left - ds
Open thanks - place to bottom - ds
Open turkey - resize by 50% - place to bottom right - ds
On background layer
Open burlap - place to left - ds
Open mask - rotate left - c/p as new layer
Open tag - rotate to right - place to the right - ds
Delete background - merge visible
Add credits and name
Saturday, November 1, 2014

*click on image to view full size*
PTU Painted Gold
This tutorial was written by me on November 1, 2014.
It was made out of my own creation and any similarity is purely coincidental.
I used pspx6 but any version should work without problems.
If you're doing this tutorial you must have good psp knowledge and be familiar with the tools.
Let's get started!
Artist: Gold Babe Year by Arthur Crowe
Scrapkit: Golden Girl Kit by Niqui's Designs
Mask: DD mask 9 HERE
Font: Fleur De Leah
*open your mask and minimize in your workspace*
c/p = copy and paste, ds = drop shadow (I'm using V5, H5, Opacity 50, Blur 10, black)
File - New - 700x700 - flood fill w white
Open 52 - resize by 65% - c/p as new layer
Click inside your frame w magic wand - expand by 5 - new layer
Open paper6 - c/p into selection - deselect
Move paper under frame
Open 22 - resize by 50% 2x - sharpen - c/p as new layer - ds
Open 36 - resize by 50% - place to top right - ds
Open 15 - resize by 50% - place to right - ds
Open 1 - resize by 50% 2x - sharpen - place to bottom - ds
Open 11 - resize by 50% - place to right - ds
Open 8 - resize by 50% - place to bottom - ds
Open 2 - resize by 50% - place to bottom of frame - ds
Open 7 - resize by 50% 2x - sharpen - place to bottom right - ds
Open tube - resize to liking - c/p as new layer
Add drop shadow to your tube
On background layer
Click on background with magic wand - new layer
Open paper14 - c/p into selection - deselect
Layers - New mask layer - From Image
Find your mask in source window - hit ok
Merge group
Open 35 - resize by 50% - place to the right - ds
Delete background - merge visible
Crop tag if you like
Add credits and name
Monday, October 6, 2014

*click on image to view full size*
PTU Giving You That Look
This tutorial was written by me on October 6, 2014.
It was made out of my own creation and any similarity is purely coincidental.
I used pspx6 but any version should work without problems.
If you're doing this tutorial you must have good psp knowledge and be familiar with the tools.
Let's get started!
Artist: Cute Babe by Arthur Crowe
Scrapkit: Stunning Autumn by Tiny Turtle Designs
Plugins: Lokas 3D Shadow, Xero Radiance
Mask: 59 by me HERE
Font: Maratre
*open your mask and minimize in your workspace*
c/p = copy and paste, ds = drop shadow
File - New - 700x700 - flood fill w white
Click on background with magic wand - new layer
Open paper4 - c/p into selection - deselect
Layers - New mask layer - From Image
Find your mask in source window - hit ok
Merge group
Open 99 - resize by 90% - c/p as new layer - ds
Open 8 - resize by 70% - c/p as new layer
Click inside frame (8) w magic wand
Click inside your frame w magic wand - expand by 5 - new layer
Open paper3 - c/p into selection - deselect
Move paper under frame
On your frame apply Lokas 3D Shadow w following settings:
Blur: 25 Transparency: 70
Angle X: 0 Angle Y: 0 Angle Z: 0
Zoom: 100 Offset X: 5 Offset Y: 5
Perspective: 40 Color: Black
Hit Okay
Open 88 - resize by 50% - place to left - ds
Open 67 - place to bottom - ds
Open 65 - place to bottom left - ds
Open 101 - resize by 50% 2x - sharpen - place to left - ds
Open 80 - resize by 50% - place to bottom left - ds
Open 106 - place to right - ds
Open 97 - resize by 50% - place to right - ds
Open 120 - resize by 50% 2x - sharpen - place to bottom right - ds
Open tube - resize to liking
Xero - radiance - change beauty to 64 - hit ok
Drop shadow on your tube
Delete background layer - merge visible
Adjust - Brightness and Contrast
Local Tone Mapping - strength 4.0 - Block Size 35 - hit ok
Add credits and name
Monday, September 22, 2014

*click on image to view full size*
PTU I'll Light Your Fire
This tutorial was written by me on September 22, 2014.
It was made out of my own creation and any similarity is purely coincidental.
I used pspx6 but any version should work without problems.
If you're doing this tutorial you must have good psp knowledge and be familiar with the tools.
Let's get started!
Artist: Fire Goddess by Arthur Crowe
Scrapkit: Fairyland Fire by Amy Marie's Kits
Mask: 18 by me HERE
Font: Bulgaria Moderna
*open your mask and minimize in your workspace*
c/p = copy and paste, ds = drop shadow
File - New - 700x700 - flood fill w white
Open 23 - c/p as new layer
Open tube close-up - move under frame
Place face so its inside frame
Click inside your frame w magic wand - expand by 5 - new layer
Open paper of choice - c/p into selection
Move paper under tube layer
On tube - invert - delete - deselect
Change tube blend mode to screen - opacity to 85
Add drop shadow to your frame
Make background layer invisible - merge visible
Make background layer visible
Move merged layer to the right some
Open 106 - place to bottom - ds
Open 121 - place to bottom right - ds
Open 32 - place to bottom left - ds
Open 82 - resize by 50% - 2x - sharpen - place to bottom - ds
Open tube - resize to fit your tag - place to the right some
Add drop shadow to your tube
On background layer
Click on background with magic wand - new layer
Open paper1 - c/p into selection - deselect
Layers - New mask layer - From Image
Find your mask in source window - hit ok
Merge group
Duplicate mask - merge down
Open 57 - place to left - rotate to left some - and move down some - ds
Duplicate 57 - move to the top right
Open 11 - place to the left - ds
Duplicate 11 and mirror
Open 90 - place to bottom and right - ds
Open 120 - place to the right - ds
Open 114 - place to the bottom - ds
Delete background layer - merge visible
Add credits and name
Saturday, September 20, 2014

FTU Enjoy The Moment
This tutorial was written by me on September 20, 2014.
It was made out of my own creation and any similarity is purely coincidental.
I used pspx6 but any version should work without problems.
If you're doing this tutorial you must have good psp knowledge and be familiar with the tools.
Let's get started!
Artist: Natural Beauty by Arthur Crowe
Scrapkit: Autumn Awaits by Gimptastic Scraps
Mask: 72 by me HERE
Plugins: Xero - Radiance
Font: Phraell
*open your mask and minimize in your workspace*
c/p = copy and paste, ds = drop shadow
File - New - 700x700 - flood fill w white
Open frame 4 - resize by 75% - c/p as new layer
Click inside your frame w magic wand - expand by 5 - new layer
Open paper4 - c/p into selection - deselect
Move paper under frame
Open chicken wire - resize by 50% - place to left of frame - ds
Add drop shadow to your frame
Open window - resize by 50% - place to the right - rotate to right some - ds
Open grass - place to the right - ds
Open deco - place to left - ds
Open bow - resize by 50% - place to top left - ds
Open mushroom - place to the left - ds
Open tube - resize to liking - place in middle
Xero - radiance - change beauty to 97 - hit ok
Add drop shadow to your tube
Open leaf3 - place to bottom left - ds
Duplicate leaf3 - mirror
Open mug - resize by 50% - place to bottom - ds
Open flower 1 - resize by 50% - place to bottom - ds
Open pinecone - resize by 50% 2x - place to bottom - ds
Open WA - resize by 50% - place to the bottom - ds
On background layer
Click on background with magic wand - new layer
Open paper5 - c/p into selection - deselect
Layers - New mask layer - From Image
Find your mask in source window - hit ok
Merge group
Duplicate mask - change blend mode to multiply
Delete background - merge visible
Crop your tag to your liking
Adjust - Brightness and Contrast
Local Tone Mapping - strength 4.0 - Block Size 35 - hit ok
Add credits and name

*click on image to view full size*
PTU The Sweetest Angel
This tutorial was written by me on September 20, 2014.
It was made out of my own creation and any similarity is purely coincidental.
I used pspx6 but any version should work without problems.
If you're doing this tutorial you must have good psp knowledge and be familiar with the tools.
Let's get started!
Artist: Angelical Eyes by Arthur Crowe
Scrapkit: Rose Angel by Scrappin' Krazy Designs
Mask: 40 by me HERE
Plugin: Xero - Radiance
Font: Calendary Hands
*open your mask and minimize in your workspace*
c/p = copy and paste, ds = drop shadow
File - New - 700x700 - flood fill w white
Open 18 - resize by 80% - c/p as new layer
Click inside your frame w magic wand - expand by 5 - new layer
Open paper2 - c/p into selection - deselect
Move paper under frame
Duplicate paper - change blend mode to screen - opacity to 67
Add drop shadow to your frame
Open 38 - c/p as new layer - mirror - place to left - ds
Open 80 - resize by 50% - place to top left - rotate to the left - ds
Open tube - resize to liking - c/p as new layer
Place tube so its in middle of frame
With your eraser remove some of the legs so tube is against edge of inside of frame
On tube - Xero - radiance - change beauty to 97 - hit ok
Add drop shadow to your tube
Open 56 - move to bottom some
Open 59 - resize by 50% - place to bottom - ds
Open 23 - resize by 50% 2x - sharpen - place to right - ds
Duplicate 23 - move down some and to left a little bit - ds
Open 15 - resize by 50% 2x - sharpen - place to bottom - ds
Open 16 - resize by 50% 2x - sharpen - place to bottom - ds
Open 67 - resize by 50% 2x - sharpen - place to bottom left - ds
Open 1 - resize by 50% 2x - sharpen - place to bottom left - ds
On background layer
Click on background with magic wand - new layer
Open paper18 - c/p into selection - deselect
Layers - New mask layer - From Image
Find your mask in source window - hit ok
Merge group
Duplicate mask - change blend to overlay
Open 47 - place to bottom right
Duplicate 47 - mirror - move up some
Open 76 - c/p as new layer - mirror - ds
Delete background layer - merge visible
Adjust - Brightness and Contrast
Local Tone Mapping - strength 4.0 - Block Size 35 - hit ok
Crop your tag if you would like to (I did)
Add credits and name
Monday, September 8, 2014
*click on image to view full size*
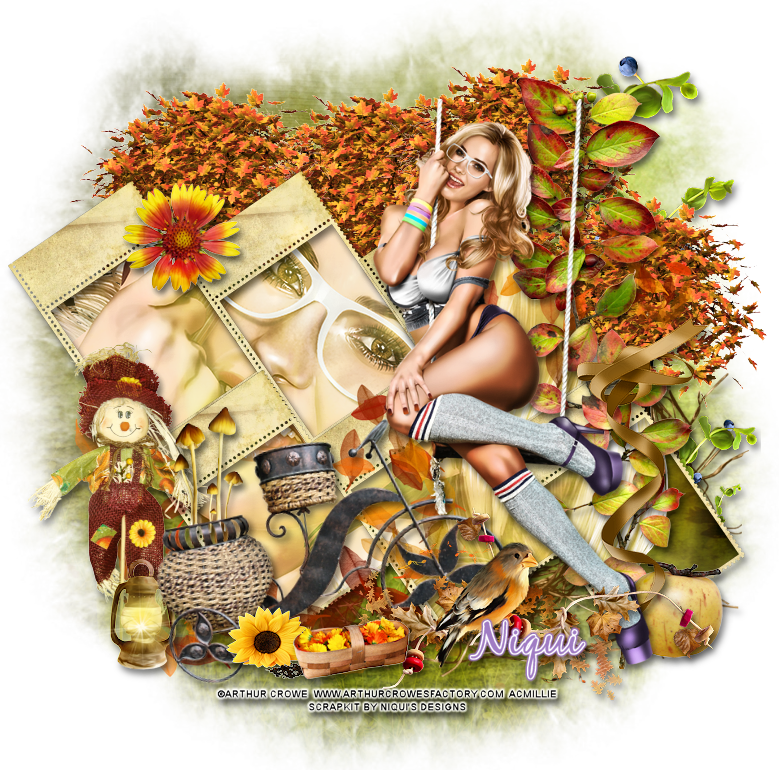
PTU Dreaming in Autumn
This tutorial was written by me on September 8, 2014.
It was made out of my own creation and any similarity is purely coincidental.
I used pspx6 but any version should work without problems.
If you're doing this tutorial you must have good psp knowledge and be familiar with the tools.
Let's get started!
Artist: Sexy Song Rain by Arthur Crowe
Scrapkit: Autumn Charm by Niqui's Designs
Mask: DBV mask 111
Font: Blackjack
*open your mask and minimize in your workspace*
c/p = copy and paste, ds = drop shadow
File - New - 800x800 - flood fill w white
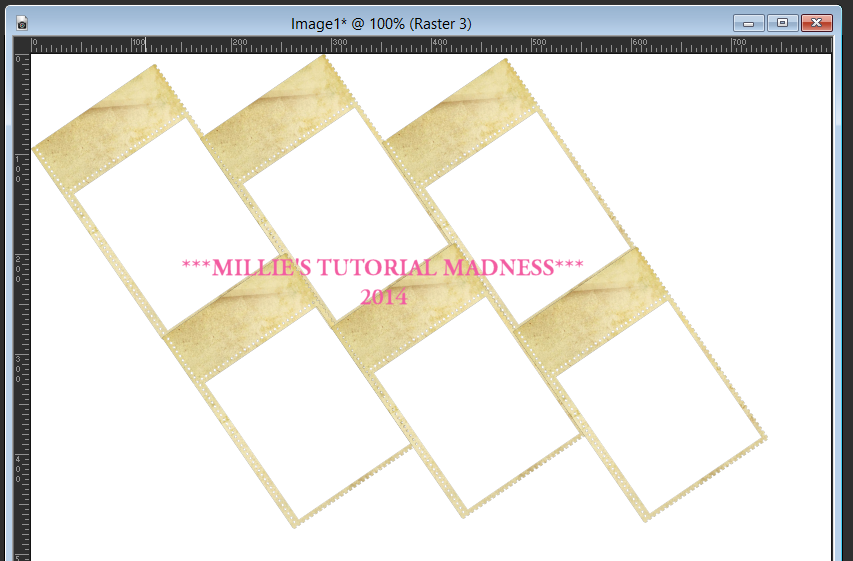
Open 24 - resize by 40% sharpen - place to the top left
Duplicate - place it so that is next to the first frame touching on the side
Duplicate one more time and have this piece touching the middle piece
Close background layer - merge visible
Duplicate merged and move down so that the frames are touching
Merge down
They will look something like the picture below:
Open tube close up - c/p as new layer
Move tube under merged layer
Arrange the merged frame so that the face of the tube is inside of it
Once you are happy with the placement of the tube click inside each frame w magic wand
On tube - invert - delete - invert - new layer
Open pp1 - c/p into selection - deselect
Move paper under tube layer
On tube - xero - radiance - change beauty to 94 - hit ok
Add drop shadow to the tube
Change blend mode to screen
Add drop shadow to the frame
Close background layer - merge visible - open background layer
Rename merged layer "frame"
Rename raster 1 "background"
Move frame to the middle
Open 65 - resize by 50% - place to top left - ds
Open 29 - place to bottom
Open 39 - resize by 50% - place to left - ds
Open 36 - resize by 50% 2x - sharpen - place to bottom left - ds
Open 27 - resize by 50% 2x - sharpen - place to left - ds
Open 94 - place to the right - ds
Open 36 - resize by 75% - place to bottom - rotate some - ds
Open 41 - resize by 50% 2x - sharpen - place to bottom - ds
Open 35 - resize by 50% 2x - sharpen - place to bottom right - ds
Open 60 - resize by 50% - place to the right - ds
Open tube - resize to fit your tag
Xero - radiance - same settings as before - hit ok
Open 48 - resize by 50% - place to bottom right - ds
Open 21 - resize by 50% 2x - sharpen - place to bottom - ds
On background layer
Click on background with magic wand - new layer
Open paper5 - c/p into selection - deselect
Layers - New mask layer - From Image
Find your mask in source window - hit ok
Merge group
Open 47 - resize by 85% - place to the right - ds
Open 76 - place to the top right - ds
Open 50 - resize by 50% - place to the top - ds
Duplicate - move to the right some
Duplicate again - place to right and down some
Duplicate and move to the left
Delete background - merge visible
Adjust - Brightness and Contrast
Local Tone Mapping - strength 4.0 - Block Size 35 - hit ok
Add credits and name
Subscribe to:
Posts
(Atom)
MY BLINKIE

