Showing posts with label Gimptastic Scraps. Show all posts
Showing posts with label Gimptastic Scraps. Show all posts
Sunday, July 5, 2015

CT FOR GIMPTASTIC SCRAPS
*click on image to view full size*
PTU Waters are Dark
This tutorial was written by me on July 6, 2015.
It was made out of my own creation and any similarity is purely coincidental.
I used pspx6 but any version should work without problems.
If you're doing this tutorial you must have good psp knowledge and be familiar with the tools.
Let's get started!
Artist: Little Mermaid by Johannah Von Frankenstein
Scrapkit: Dark Waters by Gimptastic Scraps
Mask: 62 by moonbeams and spiderwebs
Font: Viner Hand ITC
*open your mask and minimize in your workspace*
c/p = copy and paste, ds = drop shadow
File - New - 700x700 - flood fill w white
Click on background with magic wand - new layer
Open paper10 - c/p into selection - deselect
Layers - New mask layer - From Image
Find your mask in source window - hit ok
Merge group
Open 47 - place to top right
Opne frame 4 - rotate to the left - c/p as new layer
Open tube close up - move under frame 4
Place the face so its inside the left rectangle in the frame
Click inside frame 4 with your magic wand
Selections - expand - 20 - hit ok
On tube layer - invert - delete - invert again - new layer
Open pp4 - copy and paste into selection
Selections - none
Move paper under tube layer
Add drop shadow to frame 4
Open 3 - resize by 80% - move to the right some - ds
Open 1 - place to the bottom - ds
Open 4 - place to bottom left - ds
Open 33 - resize by 50% - place to bottom left - ds
Open full tube - resize to your liking and place to the right some
Add drop shadow to your tube
Open 21 - resize by 60% - place to bottom right - ds
Open 29 - resize by 50% - place to bottom left - ds
Open 2 resize by 50% 2x place to bottom - ds
Open 27 - resize by 75% - place to bottom right - ds
Open 26 - resize by 50% 2x - sharpen - place to bottom
Make sure flower is between right and middle skull
Duplicate 26 - Image - flip - horizontal place between left and middle skull
Add drop shadow to both flowers
Delete background layer - merge visible
Adjust - Brightness and Contrast
Local Tone Mapping - strength 4.0 - Block Size 35 - hit ok
Add credits and name
Sunday, May 31, 2015
*click on image to view full size*
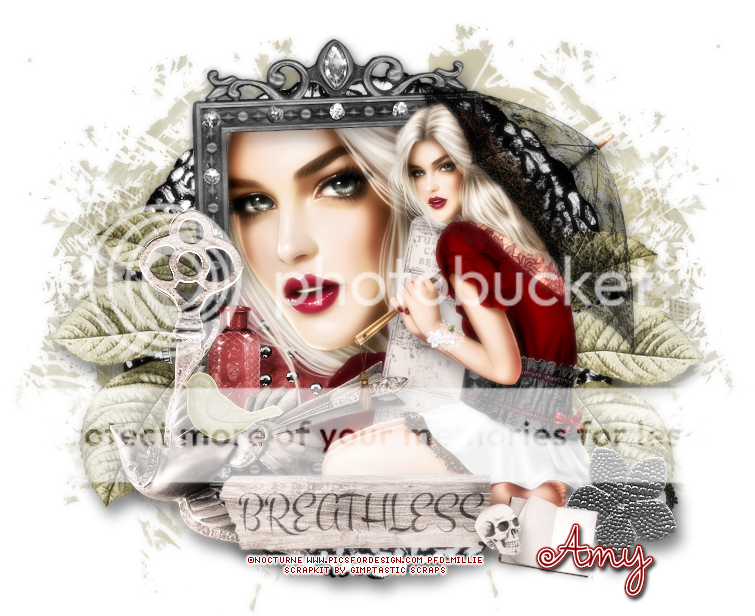
PTU So Breathless
This tutorial was written by me on May 31, 2015.
It was made out of my own creation and any similarity is purely coincidental.
I used pspx7 but any version should work without problems.
If you're doing this tutorial you must have good psp knowledge and be familiar with the tools.
Let's get started!
Artist: Parasol by Nocturne
Scrapkit: Breathless by Gimptastic Scraps
Plugin: Xero - Radiance
Font: Amelie
*open your mask and minimize in your workspace*
c/p = copy and paste, ds = drop shadow
File - New - 700x700 - flood fill w white
Open ele 30 - c/p as new layer - place to right
Duplicate - mirror - merge down
Open frame 6 - resize by 85% - move down some - ds
Open ele57 - place to left
Duplicate - mirror
Add drop shadow to both
Open frame 1 - resize by 75% - move down some
Open tube and place under your frame
Make sure face of your tube is inside of your frame
Open 11 - c/p as new layer and place under tube
Click inside frame 1 w magic wand tool
Expand by 5 and go on tube layer - invert - delete
On element 11 layer and delete
New layer
Open pp2 - c/p into selection - deselect
Move paper under element 11
Add drop shadow to element 11
On tube layer - apply xero - radiance plugin w following changes
Change beauty to 103 and hit ok
Add drop shadow to your tube
Add drop shadow to your frame
Open 34 - place to left - ds
Open 44 - resize by 50% - rotate to the right some - place to right - ds
Open 37 - resize by 50% - place to bottom right - ds
Open 41 - place to bottom left - ds
Open 54 - resize by 50% - place to bottom left - ds
Open tube - resize to liking - place to right
Apply Xero - Radiance with same settings as before
Add drop shadow to your tube
Open 36 - resize by 50% - place to bottom right - ds
Open 53 - resize by 50% 2x - sharpen - place to bottom right - ds
Delete background layer
Adjust - Brightness and Contrast
Local Tone Mapping - strength 4.0 - Block Size 35 - hit ok
Add credits and your name
Tuesday, May 12, 2015
*click on image to view full size*
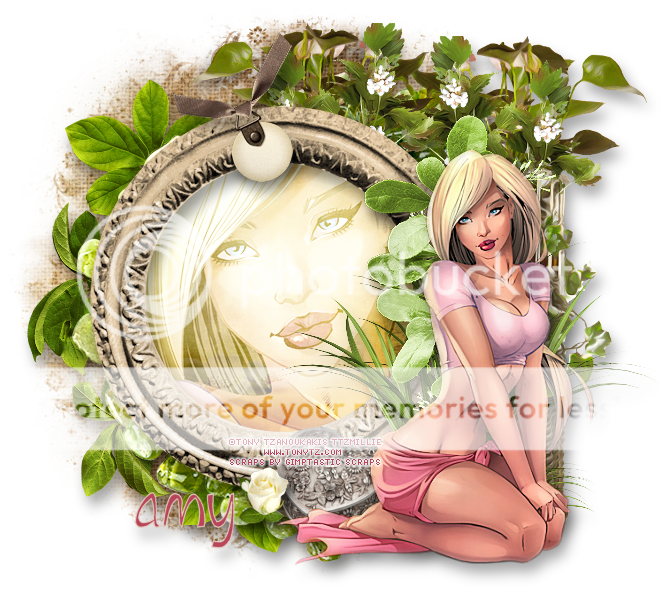
PTU Let's Have a Lovely Day
This tutorial was written by me on May 12, 2015.
It was made out of my own creation and any similarity is purely coincidental.
I used pspx6 but any version should work without problems.
If you're doing this tutorial you must have good psp knowledge and be familiar with the tools.
Let's get started!
Artist: Megan by Tony Tz
Scrapkit: Lovely Day by Gimptastic Scraps
Mask: 102 by me HERE
Font: Yangtze
*open your mask and minimize in your workspace*
c/p = copy and paste, ds = drop shadow
File - New - 700x700 - flood fill w white
Open frame 2 - resize by 70% - c/p as new layer - move to left
Open full tube and place under frame
Make sure the face is inside the frame to your liking
Click inside your frame w your magic wand - expand by 5
On tube layer - invert - delete - invert - new layer
Open pp3 - c/p into selection - deselect
Move paper under tube layer
On tube layer - change blend mode to overlay
Duplicate your tube
Add drop shadow to frame 2
Open tag - resize by 50% - place to top - ds
Open grass - place to right - ds
Open heartbox - resize by 50% - place to bottom - ds
Open flower4 - reszie by 50% twice - sharpen - place to bottom - ds
Open leaf4 - place to right - ds
Open tube - resize to liking - place to bottom right
Apply plugin Xero - Porcelain
Change the blue channel to 0 and hit ok
Add ds to your tube
On background layer
Click on background with magic wand - new layer
Open paper9 - c/p into selection - deselect
Layers - New mask layer - From Image
Find your mask in source window - hit ok
Merge group
Open vine - place to bottom left - ds
Open stones - place to right and bottom some - ds
Open plant - place to right - ds
Duplicate plant - move up and left some - ds
Delete background layer - merge visible
Add credits and name
Wednesday, April 22, 2015

*click on image to view full size*
PTU Spring Doggie
This tutorial was written by me on April 22, 2015.
It was made out of my own creation and any similarity is purely coincidental.
I used pspx6 but any version should work without problems.
If you're doing this tutorial you must have good psp knowledge and be familiar with the tools.
Let's get started!
Artist: Farm dog by Kajenna
Scrapkit: Spring day Blue Jay by Gimptastic Scraps
Mask: 102 by me HERE
Font: Dancing Script
*open your mask and minimize in your workspace*
c/p = copy and paste, ds = drop shadow
File - New - 700x700 - flood fill w white
Click on background with magic wand - new layer
Open paper10 - c/p into selection - deselect
Layers - New mask layer - From Image
Find your mask in source window - hit ok
Merge group
Frame 5 - resize by 75% - c/p as new layer
Click inside your frame w magic wand - expand selection by 5
Add a new layer
Open paper2 - c/p into selection - deselect
Move paper under frame
Add drop shadow to your frame
Open branch - place to top left - ds
Open grass - place to right - ds
Open flower 4 - place to middle - ds
Open flower 5 - place to bottom right - ds
Open heart 2 - place to bottom - ds
Open flower 3 - place to bottom right - ds
Open tube - resize to your liking and place to left - ds
Delete background - merge visible
Add credits and name
Sunday, April 12, 2015

*click on image to view full size*
PTU Springy In The Air
This tutorial was written by me on April 12, 2015.
It was made out of my own creation and any similarity is purely coincidental.
I used pspx7 but any version should work without problems.
If you're doing this tutorial you must have good psp knowledge and be familiar with the tools.
Let's get started!
Artist: Verymany
Scrapkit: Signs of Spring by Gimptastic Scraps
Plugin: Xero - Porcelain
Font: any of choice
*open your mask and minimize in your workspace*
c/p = copy and paste, ds = drop shadow
File - New - 700x700 - flood fill w white
Open deco - place to bottom right - ds
Duplicate - mirror horizontal
Open frame 1 - resize by 75% - place to bottom - ds
Click inside your frame w magic wand - expand selection by 5
Add a new layer
Open paper4 - c/p into selection - deselect
Move paper under frame
Add drop shadow to your frame
Open ribbon - place to bottom - ds
Open butterflies - resize by 70% - place to left - ds
Open flower 2 - place to bottom right - ds
Open fence - resize by 70% - place to middle and down some - ds
Open beads - place to bottom right - ds
Open jar - place to right - ds
Open flower1 - place to right - ds
Open leaf1 - place to right - ds
Open nest - resize by 50% - place to bottom - ds
Open frog - place to bottom right - ds
Open lemon - resize by 50% 2x - sharpen - place to bottom left - ds
Open tube - resize by 50%
Using color changer - change clothes color to match tag
Copy merged as a new layer - place to left
Xero - porcelain - change blue channel to 0 - hit ok
Add drop shadow to your tube
Delete background layer - merge visible
Adjust - Brightness and Contrast
Local Tone Mapping - strength 4.0 - Block Size 35 - hit ok
Add credits and name
Friday, February 6, 2015

*click on image to view full size*
PTU Love You
This tutorial was written by me on February 6, 2015.
It was made out of my own creation and any similarity is purely coincidental.
I used pspx6 but any version should work without problems.
If you're doing this tutorial you must have good psp knowledge and be familiar with the tools.
Let's get started!
Artist: Freya Landford-Sidebottom
Scrapkit: Cherry Berry Crush by Gimptastic Scraps
Mask: 111 by me HERE
Font: Plaster of Paris
*open your mask and minimize in your workspace*
c/p = copy and paste, ds = drop shadow
File - New - 700x700 - flood fill w white
Click on background with magic wand - new layer
Open paper4 - c/p into selection - deselect
Layers - New mask layer - From Image
Find your mask in source window - hit ok
Merge group
Open word art - c/p as a new layer
Open window - c/p as new layer - ds
Open heart scatter - place left - ds
Open petals - place left - ds
Open tube - resize to liking - place bottom - ds
Open label 1 - place to bottom right - ds
Open teapot - place to bottom left - rotate - ds
Open teddy - resize by 50% - place to bottom left - ds
Open yarn - resize by 50% - place to bottom left - ds
Delete background - merge visible
Add credits and name
Thursday, January 8, 2015

*click on image to view full size*
PTU Paris Love
This tutorial was written by me on January 8, 2015.
It was made out of my own creation and any similarity is purely coincidental.
I used pspx6 but any version should work without problems.
If you're doing this tutorial you must have good psp knowledge and be familiar with the tools.
Let's get started!
Artist: Lavoyeouse by Cris de Lara
Scrapkit: Amour de Paris by Gimptastic Scraps
Plugin: Xero - Porcelain
Font: Allura
*open your mask and minimize in your workspace*
c/p = copy and paste, ds = drop shadow
File - New - 700x700 - flood fill w white
Open splatter - place to the left - duplicate - mirror
Open frame 1 - c/p as new layer
Click inside your frame w magic wand - expand by 5 - new layer
Open paper5 - c/p into selection - deselect
Move paper under frame
Add drop shadow to your frame
Open heart scatter - place to left - ds
Open tape - place to top right - ds
Open sign - resize by 50% - place to left - ds
Open thimble - place to top right - ds
Open typewriter - place to the right - ds
Open half tube - c/p as new layer
Xero - porcelain - change blue channel to 0 - hit ok
Add drop shadow to your tube
Open stamp - resize by 50% - place to bottom right - ds
Open rose - resize by 50% - place to bottom right - ds
Open winged heart - place to bottom - ds
Open camera - resize by 50% - place to bottom left - ds
Open WA - resize by 50% - place to bottom
Delete background layer - merge visible
Add credits and name
Friday, December 26, 2014
*click on image to view full size*
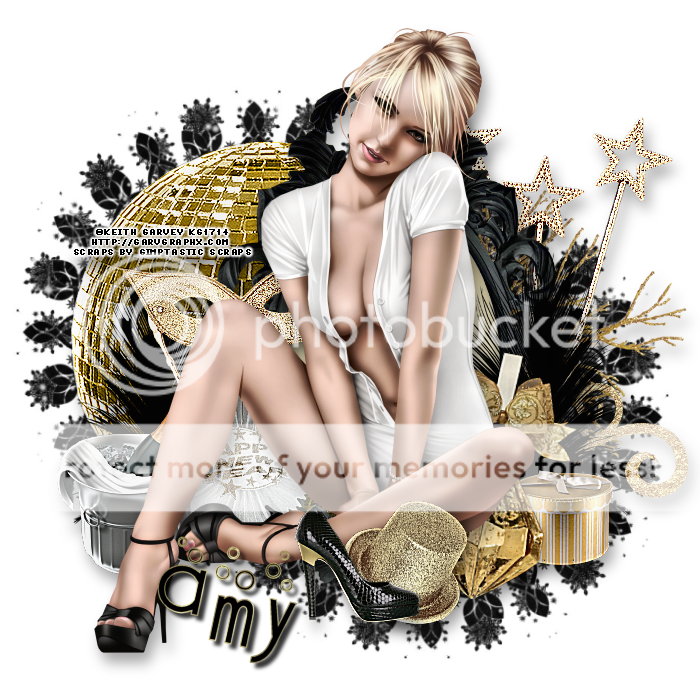
FTU Awaiting Your New Year's Kiss
This tutorial was written by me on December 26, 2014.
It was made out of my own creation and any similarity is purely coincidental.
I used pspx6 but any version should work without problems.
If you're doing this tutorial you must have good psp knowledge and be familiar with the tools.
Let's get started!
Artist: Sweet by Keith Garvey
Scrapkit: FTU Happy New Year by Gimptastic Scraps
Mask: 107 by me HERE
Font: Cocktail Bubbly
*open your mask and minimize in your workspace*
c/p = copy and paste, ds = drop shadow
File - New - 700x700 - flood fill w white
Click on background with magic wand - new layer
Open paper1 - c/p into selection - deselect
Layers - New mask layer - From Image
Find your mask in source window - hit ok
Merge group
Resize mask by 75% - move to left and up some
Duplicate mask - mirror - move to bottom
Open branch - c/p as new layer - mirror
Move to the right
Open swirl - bottom right - ds
Stars - place to the right - ds
Glitter ball - place to left - ds
Open frame 1 - c/p as new layer - move to right some
Click inside your frame w magic wand - expand by 5 - new layer
Open paper6 - c/p into selection - deselect
Move paper under frame
Add drop shadow of choice to your frame
Open feather2 - place to right - ds
Duplicate - mirror
Open box 1 - resize by 50% - place to bottom right - ds
Open deco 3 - resize by 75% - place to bottom right
Rotate to the right w your deform tool - ds
Open mask - place to bottom left - ds
Open champagne bucket - resize by 50% - place to bottom left - ds
Open tube - c/p as new layer - move to right a little bit
Xero - radiance - change beauty to 97 - hit ok
Add drop shadow to your tube
Open hat - resize to 50% - place to the bottom - ds
Open heel - resize by 50% - place to the bottom - ds
Delete background layer - merge visible
Adjust - Brightness and Contrast
Local Tone Mapping - strength 4.0 - Block Size 35 - hit ok
Add credits and add name
Sunday, December 21, 2014
*click on image to view full size*
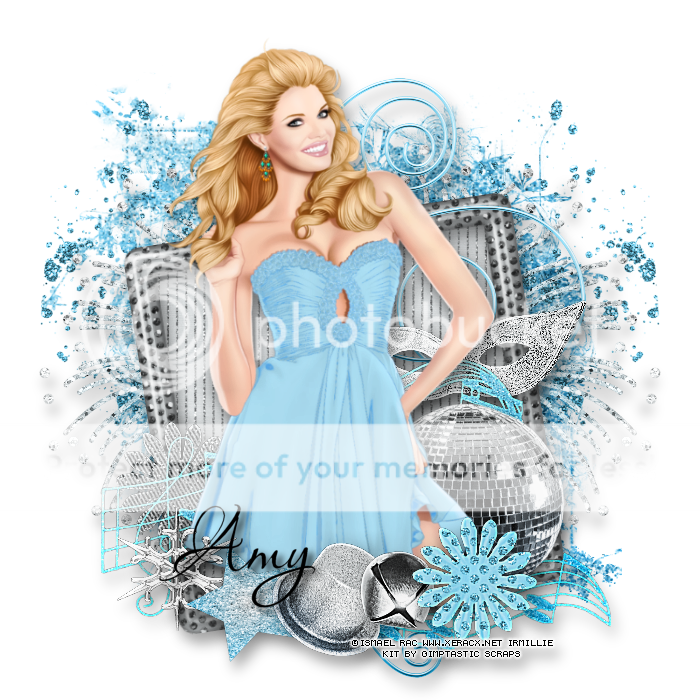
PTU Ready for The Party
This tutorial was written by me on December 21, 2014.
It was made out of my own creation and any similarity is purely coincidental.
I used pspx6 but any version should work without problems.
If you're doing this tutorial you must have good psp knowledge and be familiar with the tools.
Let's get started!
Artist: 2013 Valentine's Date by Ismael Rac
Scrapkit: Birthstone Series: Blue Topaz by Gimptastic Scraps
Mask: 44 by MB and SW
Font: Aquarelle
*open your mask and minimize in your workspace*
c/p = copy and paste, ds = drop shadow
File - New - 700x700 - flood fill w white
Open frame 4 - resize by 65% - rotate left some
Click inside your frame w magic wand - expand by 5 - new layer
Open paper1 - c/p into selection - deselect
Move paper under frame
Add ds to your frame
Open flower 1 - resize by 50% - place to bottom left - ds
Open swirl - place to the right - ds
Open mask - place to the right - ds
Open music notes - resize by 80% - place to bottom right - ds
Open disco ball - resize by 65% - place to bottom right - ds
Open tube
Recoloring tube to match the kit
Find the layer on the tube that is blue
Use your dropper tool to pick the light blue that matches
Make that your foreground color
With your color changer tool - left click on the blue layer of the tube
Do this until you are happy that it matches the way you like
Copy merged - place to the middle - resize to liking
Xero - radiance - change beauty to 71 - hit ok
Add drop shadow to your tube
Open snowflake - resize by 50% - place to bottom left - ds
Open star - resize by 50% - place to bottom right - ds
Open hat - resize by 50% - place to bottom - ds
Open bell - resize by 50% - place to bottom - ds
Open flower 2 - resize by 50% - place to bottom - ds
On background layer
Click on background with magic wand - new layer
Open paper5 - c/p into selection - deselect
Layers - New mask layer - From Image
Find your mask in source window - hit ok
Merge group
Resize mask by 90%
Duplicate mask - change blend mode to multiply - opacity to 63
Open glitter - place to left
Duplicate - mirror
Open fireworks - place to left
Duplicate - mirror
Delete background layer - merge visible
Adjust - Brightness and Contrast
Local Tone Mapping - strength 4.0 - Block Size 35 - hit ok
Add credits and name
Tuesday, December 9, 2014

*click on image to view full size*
PTU Feeling The Joy
This tutorial was written by me on December 8, 2014.
It was made out of my own creation and any similarity is purely coincidental.
I used pspx6 but any version should work without problems.
If you're doing this tutorial you must have good psp knowledge and be familiar with the tools.
Let's get started!
Artist: Alexia by Jose Cano
Scrapkit: Christmas Joy by Gimptastic Scraps
Mask: 102 by me
Font: Anglia Script
*open your mask and minimize in your workspace*
c/p = copy and paste, ds = drop shadow
File - New - 700x700 - flood fill w white
Click on background with magic wand - new layer
Open paper of choice - c/p into selection - deselect
Layers - New mask layer - From Image
Find your mask in source window - hit ok
Merge group
Duplicate mask - change blend to multiply
Open frame 1 - c/p as new layer - move down some
Click inside your frame w magic wand - expand by 5 - new layer
Open paper9 - c/p into selection - deselect
Move paper under frame
Open branch 3 - place to bottom right - ds - duplicate - mirror
Merge down
Open bauble2 - place to top left - ds
Open frame 6 - rotate to left some
Open tube and place under frame - move tube left and down
so that the face is inside of bottom frame
Duplicate tube - mirror move up some so face is inside right frame
Merge tube down
On merged tube layer apply Xero - porcelain - w default settings - hit ok
Change tube layer to overlay
Click inside frame w magic wand
On tube layer - invert - delete - invert
New layer
Open pp of choice and copy into selection - deselect
Move under tube layer
Add drop shadow to frame 6
Merge tube down to paper and then frame down to tubes
Open jars - place to bottom right - ds
Open flower 1 - place to bottom left - ds
Duplicate - mirror
Open branch 1 - place to the bottom - ds
Open box - resize by 50% - place to bottom left - ds
Open harp - place to right - ds
Open rose - resize by 70% - place to bottom right - ds
Duplicate - mirror
Open tube - resize to liking - c/p as new layer
Xero - porcelain - change blue channel to 0 - hit ok
Open teacup - resize by 50% - place to bottom left - ds
Open gift 1 - resize by 50% - place to bottom - ds
Open gift 3 - resize by 50% - place to bottom - ds
Delete background - merge visible
Adjust - Brightness and Contrast
Local Tone Mapping - strength 4.0 - Block Size 35 - hit ok
Add credits and name
Monday, November 24, 2014

*click on image to view full size*
PTU Wonderful Christmas
This tutorial was written by me on November 24, 2014.
It was made out of my own creation and any similarity is purely coincidental.
I used pspx6 but any version should work without problems.
If you're doing this tutorial you must have good psp knowledge and be familiar with the tools.
Let's get started!
Artist: Winter Evening by Zlata M
Scrapkit: Holiday Hush by Gimptastic Scraps
Plugins: Xero - Porcelain, Lokas 3D Shadow
Mask: 102 by me HERE
Font: St Nicholas
*open your mask and minimize in your workspace*
c/p = copy and paste, ds = drop shadow
File - New - 700x700 - flood fill w white
Click on background with magic wand - new layer
Open paper1 - c/p into selection - deselect
Layers - New mask layer - From Image
Find your mask in source window - hit ok
Merge group
Resize mask to liking - change opacity to 71
Open frame 1 - resize by 80% - c/p as new layer
Click inside your frame w magic wand - expand by 5 - new layer
Open paper7 - c/p into selection - deselect
Move paper under frame
Apply Lokas 3D shadow with the following settings:
Blur: 25 Transparency: 70
Angle X: 0 Angle Y: 0 Angle Z: 0
Zoom: 100 Offset X: 5 Offset Y: 5
Perspective: 40 Color: Black
Hit Okay
Open sheet music - rotate to right a little - place to right - sharpen - ds
Open tree - resize by 80% - sharpen - place to right - ds
Open birdhouse - resize by 50% - place to bottom right - ds
Open bird 2 - resize by 50% - place to right on top of birdhouse - ds
Open half tube - resize to liking - c/p as new layer
Xero - radiance - change beauty to 84 - hit ok
Add drop shadow to your tube
Open torn paper - resize by 70% - place to bottom left - ds
rotate towards the right some
Open poinsettia 2 - resize by 50% - place to bottom right - ds
Open gift - resize by 50% - place to bottom right - ds
Open poinsettia 2 - resize by 50% - place to bottom - ds
Open rocking horse - resize by 50% - place to the bottom - ds
Delete background layer - merge visible
Add credits and name
Thanks for trying my tutorial!
Wednesday, November 19, 2014
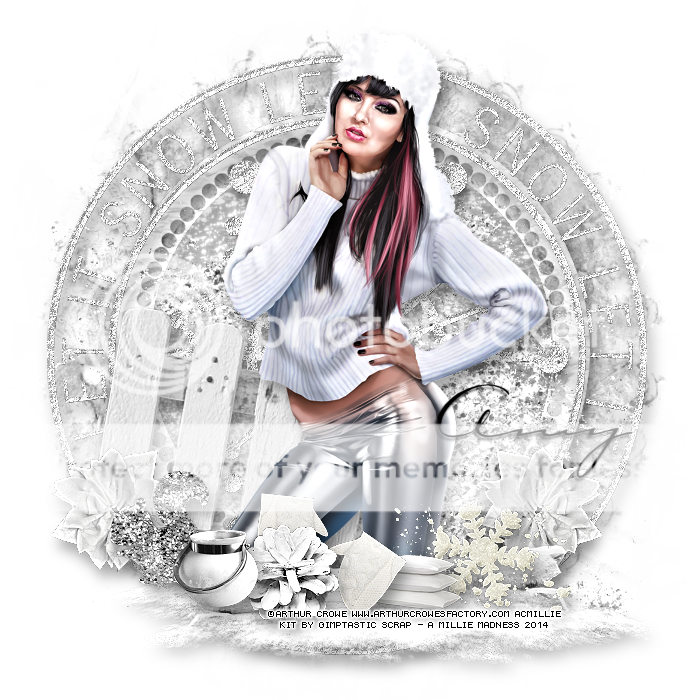
*click on image to view full size*
PTU Snow Fantasy
This tutorial was written by me on November 19, 2014.
It was made out of my own creation and any similarity is purely coincidental.
I used pspx6 but any version should work without problems.
If you're doing this tutorial you must have good psp knowledge and be familiar with the tools.
Let's get started!
Artist: Lady Silver by Arthur Crowe
Scrapkit: Winter Wishes by Gimptastic Scraps
Mask: 127 by DBV
Font: Carlotta
*open your mask and minimize in your workspace*
c/p = copy and paste, ds = drop shadow
File - New - 700x700 - flood fill w white
Click on background with magic wand - new layer
Open paper8 - c/p into selection - deselect
Layers - New mask layer - From Image
Find your mask in source window - hit ok
Merge group
Open frame 5 - resize by 80 - c/p as new layer
Click inside your frame w magic wand - expand by 5 - new layer
Open paper5 - c/p into selection - deselect
Move paper under frame
Add drop shadow to your frame
Open deco - c/p as new layer - ds
Open glitter - c/p as new layer - move down some
Open fence - place to left - rotate to right a little bit - ds
Open flower 1 - resize by 50% - place to bottom left - ds
Duplicate - mirror
Open tube - resize to your liking - place to center - ds
Open snowy log - place to bottom right - ds
Open snowflake3 - resize by 50% - place to bottom right - ds
Open pillows - resize by 50% 2x - place to bottom - ds
Open mittens - resize by 50% - place to bottom - ds
Open squirrel - resize by 50% - place to bottom left - ds
Open pinecone - resize by 50% - place to bottom - ds
Open jar - resize by 50% - place to bottom - ds
Delete background layer - merge visible
Adjust - Brightness and Contrast - Fill Light/ Clarity
Fill Light 41 Clarity 45
Hit ok
Add credits and name
Thursday, November 6, 2014

*click on image to view full size*
PTU Let's Give Thanks Tutorial
This tutorial was written by me on November 6, 2014.
It was made out of my own creation and any similarity is purely coincidental.
I used pspx6 but any version should work without problems.
If you're doing this tutorial you must have good psp knowledge and be familiar with the tools.
Let's get started!
Artist: Thankful Bonus by Arthur Crowe
Scrapkit: Give Thanks by Gimptastic Scraps
Plugins: Xero - Radiance
Font: Qamic Sans
*open your mask and minimize in your workspace*
c/p = copy and paste, ds = drop shadow (I'm using V5, H5, Opacity 50, Blur 10, black)
File - New - 700x700 - flood fill w white
Open frame 4 - resize by 80% - c/p as new layer
Click inside your frame w magic wand - expand by 5 - new layer
Open paper5 - c/p into selection - deselect
Move paper under frame
Open heart - place to top right - ds
Open knot - place to left - ds
Open leaf3 - place to left - ds
Open berries - place to right - ds
Open pumpkin - resize by 50% - place to bottom right - ds
Open square brad - resize by 50% - place to left - rotate - ds
Open half tube - resize to liking - c/p as new layer
Xero - radiance - change beauty by 128
Open pilgrim hat - resize by 50% - place to bottom left - ds
Open owl - resize by 50% 2x - place to bottom left - ds
Open thanks - place to bottom - ds
Open turkey - resize by 50% - place to bottom right - ds
On background layer
Open burlap - place to left - ds
Open mask - rotate left - c/p as new layer
Open tag - rotate to right - place to the right - ds
Delete background - merge visible
Add credits and name
Saturday, November 1, 2014

*click on image to view full size*
PTU Feeling that Crisp Fall Air
This tutorial was written by me on November 1, 2014.
It was made out of my own creation and any similarity is purely coincidental.
I used pspx6 but any version should work without problems.
If you're doing this tutorial you must have good psp knowledge and be familiar with the tools.
Let's get started!
Artist: Elias Chatzoudis
Scrapkit: Season of Change by Gimptastic Scraps
Mask: DBV mask 111
Font: Eight Fifteen
*open your mask and minimize in your workspace*
c/p = copy and paste, ds = drop shadow (I'm using V5, H5, Opacity 50, Blur 10, black)
File - New - 700x700 - flood fill w white
Click on background with magic wand - new layer
Open paper4 - c/p into selection - deselect
Layers - New mask layer - From Image
Find your mask in source window - hit ok
Merge group
Open tracks - resize by 70% - c/p as new layer - ds
Open pine branch - place to left some - ds
Open window - c/p as new layer - ds
Open petals - place to left - ds
Open wood scatter - resize by 50% - place to the right some - ds
Open leaf swirl - c/p as new layer - ds
Open leaf 1 - place to the right - ds
Open half tube - resize to liking - place to right - ds
Open label 2 - place to bottom right - ds
Open lantern - place to left - ds
Open gourd - resize by 50% - place to the bottom left - ds
Delete background - merge visible
Crop tag to liking
Add credits and name
Wednesday, October 15, 2014

*click on image to view full size*
PTU Fun With Skulls
This tutorial was written by me on October 15, 2014.
It was made out of my own creation and any similarity is purely coincidental.
I used pspx6 but any version should work without problems.
If you're doing this tutorial you must have good psp knowledge and be familiar with the tools.
Let's get started!
Artist: Elias Chatzoudis
Scrapkit: Skellafun by Gimptastic Scraps
Mask: DBV 113
Font: Ravie
*open your mask and minimize in your workspace*
c/p = copy and paste, ds = drop shadow (I'm using V5, H5, Opacity 50, Blur 10, black)
File - New - 700x700 - flood fill w white
Open frame 4 - resize by 75% - c/p as new layer
Click inside frame - expand by 5 - new layer
Open pp7 - c/p into selection - deselect
Move pp7 under frame
Add drop shadow to your frame 2x - merge down to paper
Open hand - place to right - ds
Open hoodie - place to left - ds
Open tube - c/p as new layer
Xero - porcelain - change blue channel to 0 - hit ok
Drop shadow tube
Open stars - resize by 50% - place to bottom left - ds
Open skullrose - resize by 50% - place to bottom - ds
Open voodoo doll - resize by 50% - place to right - ds
Open potion - resize by 50% - place to bottom - ds
Open skate skull - resize by 50% - place to bottom - ds
Open scarf - resize by 50% - place to right - ds
Open radio - resize by 50% 2x - place to bottom - ds
On background layer
Click on background with magic wand - new layer
Open paper of choice - c/p into selection - deselect
Layers - New mask layer - From Image
Find your mask in source window - hit ok
Merge group
Open glitter dots - place to bottom - ds
Open glitter - place to left - ds
Open star scatter - resize by 50% - place to left - ds
Open scatter - c/p as new layer - ds
Delete background layer - merge visible
Add credits and name
Friday, October 10, 2014
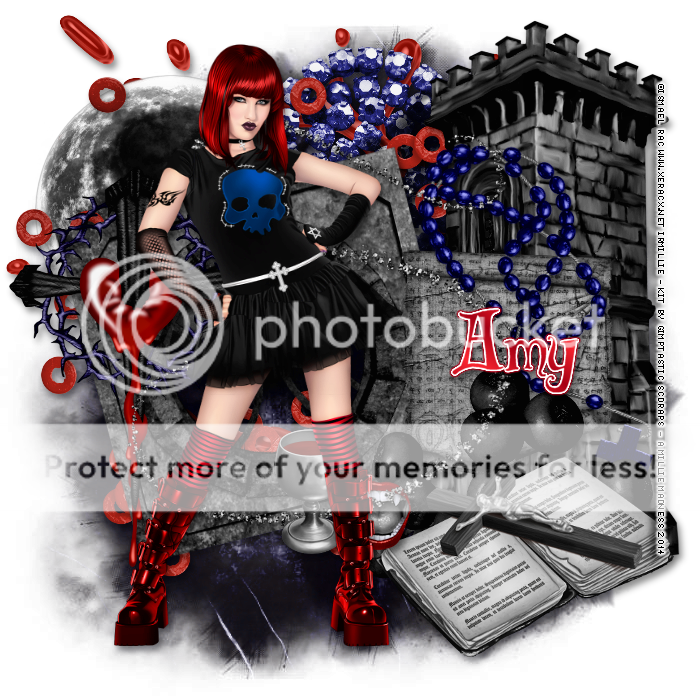
*click on image to view full size*
PTU Let The Darkness Call
This tutorial was written by me on October 10, 2014.
It was made out of my own creation and any similarity is purely coincidental.
I used pspx6 but any version should work without problems.
If you're doing this tutorial you must have good psp knowledge and be familiar with the tools.
Let's get started!
Artist: Goth Abby Fairy by Ismael Rac
Scrapkit: Darkness Calls by Gimptastic Scraps
Mask: 54 by me HERE
Font: Biblioteque
*open your mask and minimize in your workspace*
c/p = copy and paste, ds = drop shadow
File - New - 700x700 - flood fill w white
Click on background with magic wand - new layer
Open paper6 - c/p into selection - deselect
Layers - New mask layer - From Image
Find your mask in source window - hit ok
Merge group
Duplicate mask - change blend mode to multiply - merge down
Open splatter - place to top left - ds
Open moon - place to top left - ds
Open deco 2 - place to top - ds
Open cloud - resize by 85% - place to right - duplicate - mirror
Open scatter - c/p as new layer
Open window - rotate to the left - move left - ds
Open cross - place to left - ds
Open tower - place to right - ds
Open paper - resize by 75% - place to right - ds
Open rosary - place to right - ds
Open berries - place to bottom right - ds
Open bible and crucafix - place to bottom right - ds
Open vamp mouth - resize by 50% 2x - sharpen - place to bottom - ds
Open glitter - resize by 75% - c/p as new layer
Open tube - resize to fit your tag - place to right some
Xero - radiance - change beauty to 100 - hit ok
Drop shadow your tube
Delete background - merge visible
Add credits and name
Thursday, September 25, 2014
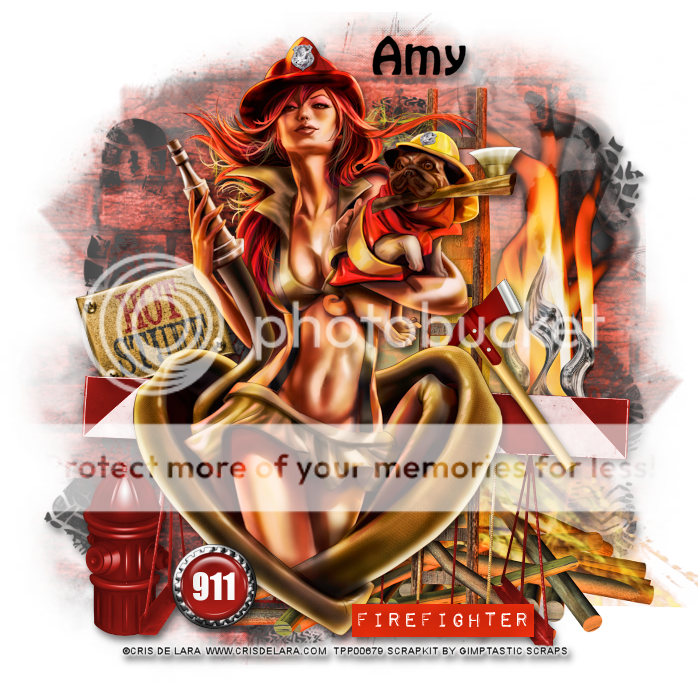
*click on image to view full size*
PTU Hot Firefighter
This tutorial was written by me on September 25, 2014.
It was made out of my own creation and any similarity is purely coincidental.
I used pspx6 but any version should work without problems.
If you're doing this tutorial you must have good psp knowledge and be familiar with the tools.
Let's get started!
Artist: Leah Firefighter by Cris De Lara
Scrapkit: Firefighter by Gimptastic Scraps
Mask: 54 by me HERE
Font: Hobo Std
*open your mask and minimize in your workspace*
c/p = copy and paste, ds = drop shadow
File - New - 700x700 - flood fill w white
Click on background with magic wand - new layer
Open paper5 - c/p into selection - deselect
Layers - New mask layer - From Image
Find your mask in source window - hit ok
Merge group
Open footprints - c/p as new layer - ds
Open sign - resize by 50% - place to the left - rotate to left - ds
Oepn flames - place to the right
Open burning ladder - place to the right - ds
Open hydrant - resize by 50% - place to the bottom left - ds
Open barricade - place to the bottom - ds
Open axe - resize by 50% - place to the right - ds
Open tube - c/p as new layer
Xero - radiance - change beauty to 112 - hit ok
Open firefighter - place to bottom right - ds
Open brad - resize by 50% - place to bottom left - ds
Delete background layer - merge visible
Adjust - Brightness and Contrast
Local Tone Mapping - strength 4.0 - Block Size 35 - hit ok
Add Credits and name
Saturday, September 20, 2014

FTU Enjoy The Moment
This tutorial was written by me on September 20, 2014.
It was made out of my own creation and any similarity is purely coincidental.
I used pspx6 but any version should work without problems.
If you're doing this tutorial you must have good psp knowledge and be familiar with the tools.
Let's get started!
Artist: Natural Beauty by Arthur Crowe
Scrapkit: Autumn Awaits by Gimptastic Scraps
Mask: 72 by me HERE
Plugins: Xero - Radiance
Font: Phraell
*open your mask and minimize in your workspace*
c/p = copy and paste, ds = drop shadow
File - New - 700x700 - flood fill w white
Open frame 4 - resize by 75% - c/p as new layer
Click inside your frame w magic wand - expand by 5 - new layer
Open paper4 - c/p into selection - deselect
Move paper under frame
Open chicken wire - resize by 50% - place to left of frame - ds
Add drop shadow to your frame
Open window - resize by 50% - place to the right - rotate to right some - ds
Open grass - place to the right - ds
Open deco - place to left - ds
Open bow - resize by 50% - place to top left - ds
Open mushroom - place to the left - ds
Open tube - resize to liking - place in middle
Xero - radiance - change beauty to 97 - hit ok
Add drop shadow to your tube
Open leaf3 - place to bottom left - ds
Duplicate leaf3 - mirror
Open mug - resize by 50% - place to bottom - ds
Open flower 1 - resize by 50% - place to bottom - ds
Open pinecone - resize by 50% 2x - place to bottom - ds
Open WA - resize by 50% - place to the bottom - ds
On background layer
Click on background with magic wand - new layer
Open paper5 - c/p into selection - deselect
Layers - New mask layer - From Image
Find your mask in source window - hit ok
Merge group
Duplicate mask - change blend mode to multiply
Delete background - merge visible
Crop your tag to your liking
Adjust - Brightness and Contrast
Local Tone Mapping - strength 4.0 - Block Size 35 - hit ok
Add credits and name
Subscribe to:
Posts
(Atom)
MY BLINKIE

