Showing posts with label Freya Langford-Sidebottom. Show all posts
Showing posts with label Freya Langford-Sidebottom. Show all posts
Friday, February 6, 2015

*click on image to view full size*
PTU Love You
This tutorial was written by me on February 6, 2015.
It was made out of my own creation and any similarity is purely coincidental.
I used pspx6 but any version should work without problems.
If you're doing this tutorial you must have good psp knowledge and be familiar with the tools.
Let's get started!
Artist: Freya Landford-Sidebottom
Scrapkit: Cherry Berry Crush by Gimptastic Scraps
Mask: 111 by me HERE
Font: Plaster of Paris
*open your mask and minimize in your workspace*
c/p = copy and paste, ds = drop shadow
File - New - 700x700 - flood fill w white
Click on background with magic wand - new layer
Open paper4 - c/p into selection - deselect
Layers - New mask layer - From Image
Find your mask in source window - hit ok
Merge group
Open word art - c/p as a new layer
Open window - c/p as new layer - ds
Open heart scatter - place left - ds
Open petals - place left - ds
Open tube - resize to liking - place bottom - ds
Open label 1 - place to bottom right - ds
Open teapot - place to bottom left - rotate - ds
Open teddy - resize by 50% - place to bottom left - ds
Open yarn - resize by 50% - place to bottom left - ds
Delete background - merge visible
Add credits and name
Saturday, January 17, 2015
*click on image to view full size*
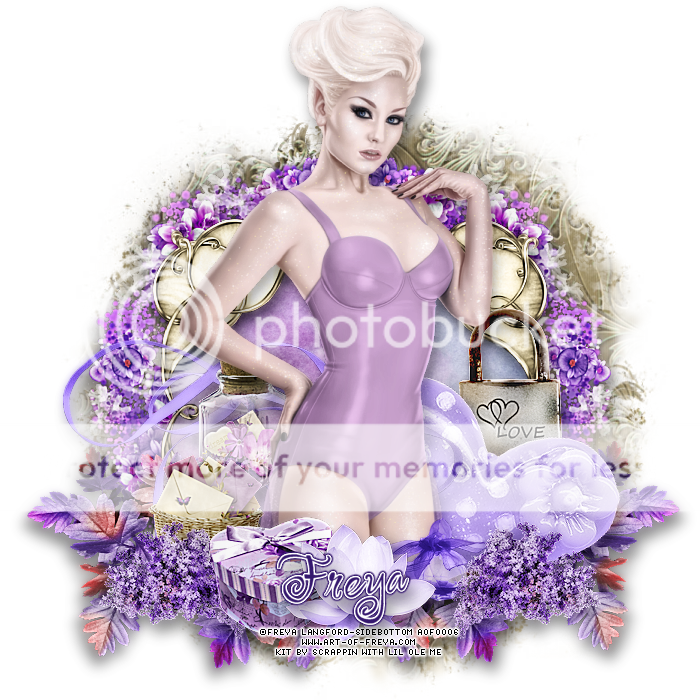
PTU So Romantic
This tutorial was written by me on January 16, 2015.
It was made out of my own creation and any similarity is purely coincidental.
I used pspx6 but any version should work without problems.
If you're doing this tutorial you must have good psp knowledge and be familiar with the tools.
Let's get started!
Artist: Romanie Snow by Freya Langford-Sidebottom
Scrapkit: Vintage Valentine by Scrappin With LIl Ole Me
Mask: 102 by me HERE
Font: P22Oh Ley
*open your mask and minimize in your workspace*
c/p = copy and paste, ds = drop shadow
Go to materials palette, click on background color and pick a color of liking
(A color that is going to match the kit that you will use)
I picked one from one of the flowers in the kit
Open tube and duplicate it - close original tube
Go to Clothes - greyscale layer of tube
Using your color changer tool, click on clothes and fill w background color
Do the same thing to Skirt layer
Minimize your tube until needed
File - New - 700x700 - flood fill w white
Click on background with magic wand - new layer
Open paper21 - c/p into selection - deselect
Layers - New mask layer - From Image
Find your mask in source window - hit ok
Merge group
Resize mask to your liking
Open 106 - resize by 75% - place to the right some
Duplicate - mirror - merge down - ds
Open 68 - resize by 65% - c/p as new layer - place to bottom
Click inside your frame w magic wand - expand by 5 - new layer
Open paper1 - c/p into selection - deselect
Move paper under frame
Add drop shadow to your frame
Open 116 - resize by 50% - place to right - ds
Open 98 - resize by 50% - place to bottom right - ds
Duplicate - mirror
Open 119 - place to the right - ds
Open 130 - resize by 50% - place to left - ds
Open 97 - resize by 50% 2x - sharpen - place to left - ds
Open 99 - resize by 50% 2x - sharpen - place to bottom left - ds
Open minimized tube - copy merged - c/p as new layer
Resize to your liking - place to bottom some - ds
Open 124 - resize by 50% 2x - sharpen - place to bottom right - ds
Open 138 - resize by 50% 2x - sharpen - place to bottom left - ds
Duplicate - mirror
Open 39 - resize by 50% 2x - sharpen - place to bottom left - ds
Open 129 - resize by 50% 2x - sharpen - place to bottom - ds
Delete background layer - merge visible
Add credits and name
Thursday, December 18, 2014
*click on image to view full size*
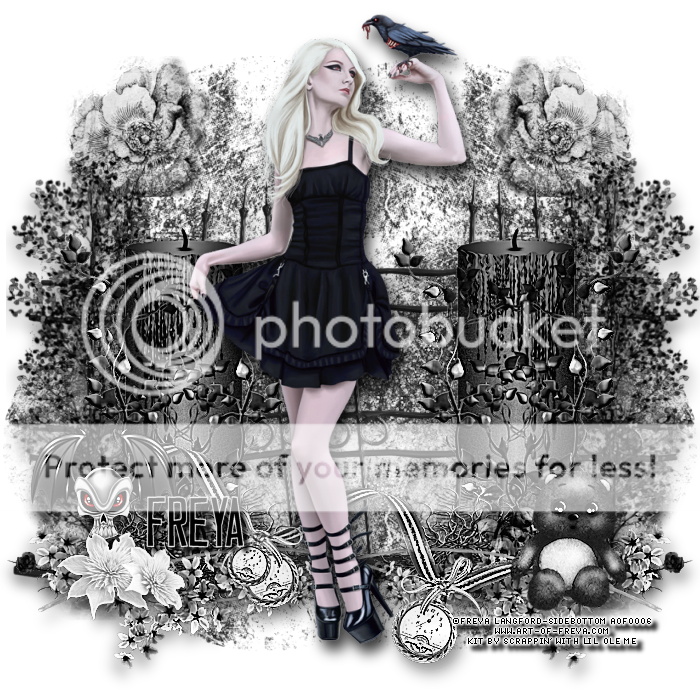
PTU I'm The Raven
This tutorial was written by me on December 18, 2014.
It was made out of my own creation and any similarity is purely coincidental.
I used pspx6 but any version should work without problems.
If you're doing this tutorial you must have good psp knowledge and be familiar with the tools.
Let's get started!
Artist: The Raven by Freya Langford-Sidebottom
Scrapkit: White N Black by Scrappin' With Lil Ole Me
Font: Casual Hardcore
*open your mask and minimize in your workspace*
c/p = copy and paste, ds = drop shadow
File - New - 700x700 - flood fill w white
Open 55 - resize by 85% - place to left - duplicate - mirror
Open 25 - resize by 70% - move to the bottom some
Open 12 - resize by 75% - place to the right - ds
Duplicate - mirror
Open 31 - resize by 70% - place to the bottom right - ds
Duplicate - mirror
Open 106 - resize by 80% - place to bottom right - ds
Duplicate - mirror
Open 83 - resize by 60% - place to the bottom - ds
Open 20 - resize by 50% 2x - sharpen - place to bottom left - ds
Open 56 - resize by 50% 2x - sharpen - place to the right - ds
Open 72 - resize by 50% 2x - place to bottom left - ds
Open tube - resize to liking - place in the middle
Add drop shadow to your tube
Delete background - merge visible
Adjust - Brightness and Contrast
Local Tone Mapping - strength 4.0 - Block Size 35 - hit ok
Add credits and name
Saturday, December 13, 2014

*click on image to view full size*
PTU In The Dark Of The Night
This tutorial was written by me on December 13, 2014.
It was made out of my own creation and any similarity is purely coincidental.
I used pspx6 but any version should work without problems.
If you're doing this tutorial you must have good psp knowledge and be familiar with the tools.
Let's get started!
Artist: Dani-Delish by Freya
Scrapkit: Midnight Masquerade by Pink Paradox Productions
Plugins: Xero - Radiance
Mask: 102 by me HERE
Font: Antalope
*open your mask and minimize in your workspace*
c/p = copy and paste, ds = drop shadow
File - New - 700x700 - flood fill w white
Open frame 9 - resize by 50% - rotate to right some
Click inside your frame w magic wand - expand by 5 - new layer
Open paper 51 - c/p into selection - deselect
Move paper under frame
Add drop shadow to your frame twice
Open 139 - resize by 50% 2x - sharpen - place to bottom left - ds
Open 220 - resize by 50% - place to the right - ds
Open 200 - resize by 50% 2x - sharpen - place to bottom left - ds
Duplicate - then mirror and move down a tiny bit
Open 125 - resize by 50% - place to the right - ds
Open 93 - resize by 50% 2x - sharpen - place to bottom right - ds
Open 122 - resize by 50% 2x - sharpen - place to bottom left - ds
Open tube - resize to your liking - c/p as new layer
Xero - radiance - change beauty to 88 - hit ok
Add drop shadow to your tube
Open 109 - resize by 50% - place to bottom - ds
Open 137 - resize by 50% 3x - sharpen - place to bottom right - ds
Open 246 - resize by 50% 2x - sharpen - place to bottom - ds
On background layer
Click on background with magic wand - new layer
Open paper16 - c/p into selection - deselect
Layers - New mask layer - From Image
Find your mask in source window - hit ok
Merge group
Open 213 - resize by 70% - move to the left - ds
Open 252 - resize by 50% - place to bottom right
Duplicate - change blend mode to multiply - merge down
Duplicate - mirror
Open 196 - resize by 60% - place to the bottom
Delete background layer - merge visible
Adjust - Brightness and Contrast
Local Tone Mapping - strength 4.0 - Block Size 35 - hit ok
Add credits and name
Monday, September 8, 2014

*click on image to view full size*
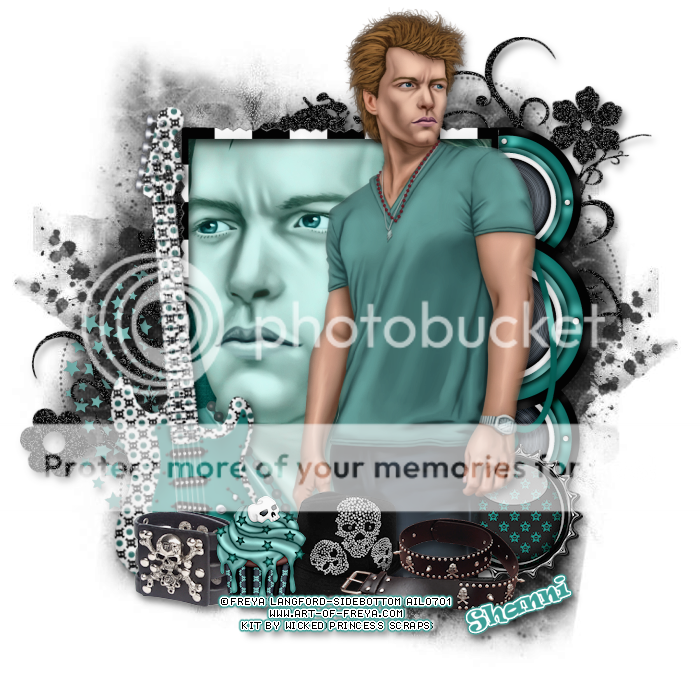
FTU Rock On
This tutorial was written by me on September 8, 2014.
It was made out of my own creation and any similarity is purely coincidental.
I used pspx6 but any version should work without problems.
If you're doing this tutorial you must have good psp knowledge and be familiar with the tools.
Let's get started!
Artist: Jon Tube by Freya Langford-Sidebottom
Scrapkit: Hotties Of Rock by Wicked Princess Scraps
Mask: 19 by me HERE
Font: Ravie
*open your mask and minimize in your workspace*
c/p = copy and paste, ds = drop shadow
File - New - 700x700 - flood fill w white
Open frame 1 - c/p as new layer
Open tube close up - c/p as new layer - move under frame
Click inside frame w magic wand - expand by 3 - new layer
Open pp15 - c/p into selection - move paper under tube layer
On tube close up layer - invert - delete - deselect
Xero - porcelain - default settings - hit ok
Change blend mode to Luminance (L)
Duplicate tube - change blend mode to screen - opacity to 55
Add drop shadow to your frame
Open guitar - resize by 75% - place to the left - rotate some - ds
Open bracelet 2 - resize by 50% 2x - sharpen - place to bottom left - ds
Open bottle cap - resize by 50% 2x - sharpen - place to bottom right - ds
Open tube - resize to liking - c/p as new layer
Xero - porcelain - hit ok
Open hat - resize by 50% 2x - sharpen - place to bottom - ds
Open belt - resize by 50% 2x - sharpen - place to bottom right - ds
Open cupcake - resize by 50% 2x - sharpen - place to bottom - ds
On background layer
Click on background with magic wand - new layer
Open paper1 - c/p into selection - deselect
Layers - New mask layer - From Image
Find your mask in source window - hit ok
Merge group
Move mask bottom right
Duplicate mask - merge down
Duplicate and move to top left
Open star mat - resize by 50% - place to left - ds
Open doodle - c/p as new layer - move up some - ds
Open speakers - resize by 50% - free rotate by 90 degrees to left
Place to the right - ds
Delete background layer - merge visible
Adjust - Brightness and Contrast
Local Tone Mapping - strength 4.0 - Block Size 35 - hit ok
Add credits and name
Subscribe to:
Posts
(Atom)
MY BLINKIE

