Monday, November 24, 2014

*click on image to view full size*
PTU Wonderful Christmas
This tutorial was written by me on November 24, 2014.
It was made out of my own creation and any similarity is purely coincidental.
I used pspx6 but any version should work without problems.
If you're doing this tutorial you must have good psp knowledge and be familiar with the tools.
Let's get started!
Artist: Winter Evening by Zlata M
Scrapkit: Holiday Hush by Gimptastic Scraps
Plugins: Xero - Porcelain, Lokas 3D Shadow
Mask: 102 by me HERE
Font: St Nicholas
*open your mask and minimize in your workspace*
c/p = copy and paste, ds = drop shadow
File - New - 700x700 - flood fill w white
Click on background with magic wand - new layer
Open paper1 - c/p into selection - deselect
Layers - New mask layer - From Image
Find your mask in source window - hit ok
Merge group
Resize mask to liking - change opacity to 71
Open frame 1 - resize by 80% - c/p as new layer
Click inside your frame w magic wand - expand by 5 - new layer
Open paper7 - c/p into selection - deselect
Move paper under frame
Apply Lokas 3D shadow with the following settings:
Blur: 25 Transparency: 70
Angle X: 0 Angle Y: 0 Angle Z: 0
Zoom: 100 Offset X: 5 Offset Y: 5
Perspective: 40 Color: Black
Hit Okay
Open sheet music - rotate to right a little - place to right - sharpen - ds
Open tree - resize by 80% - sharpen - place to right - ds
Open birdhouse - resize by 50% - place to bottom right - ds
Open bird 2 - resize by 50% - place to right on top of birdhouse - ds
Open half tube - resize to liking - c/p as new layer
Xero - radiance - change beauty to 84 - hit ok
Add drop shadow to your tube
Open torn paper - resize by 70% - place to bottom left - ds
rotate towards the right some
Open poinsettia 2 - resize by 50% - place to bottom right - ds
Open gift - resize by 50% - place to bottom right - ds
Open poinsettia 2 - resize by 50% - place to bottom - ds
Open rocking horse - resize by 50% - place to the bottom - ds
Delete background layer - merge visible
Add credits and name
Thanks for trying my tutorial!
Thursday, November 20, 2014

*click on image to view full size*
PTU My Christmas Gifts
This tutorial was written by me on November 20, 2014.
It was made out of my own creation and any similarity is purely coincidental.
I used pspx6 but any version should work without problems.
If you're doing this tutorial you must have good psp knowledge and be familiar with the tools.
Let's get started!
Artist: Ismael Rac
Scrapkit: Christmas Joy by Niqui's Designs
Mask: 102 by me HERE
Font: Plaster of Paris
*open your mask and minimize in your workspace*
c/p = copy and paste, ds = drop shadow
File - New - 700x700 - flood fill w white
Open 19 - resize by 50% - c/p as new layer
Click inside your frame w magic wand - expand by 5 - new layer
Open paper1 - c/p into selection - deselect
Move paper under frame
Apply Lokas 3D Shadow to your frame
Blur: 25 Transparency: 70
Angle X: 0 Angle Y: 0 Angle Z: 0
Zoom: 100 Offset X: 5 Offset Y: 5
Perspective: 40 Color: Black
Hit Okay
Open tube - resize to liking - c/p as new layer
Xero - radiance - change beauty to 121 - hit ok
Open 59 - resize by 50 % 2x - sharpen - place to left - ds
Open 22 - resize by 50 % 2x - sharpen - place to bottom right - ds
Open 38 - resize by 50 % 2x - sharpen - place to bottom - ds
Open 42 - resize by 50 % 2x - sharpen - place to bottom left - ds
Open 40 - resize by 50 % 2x - sharpen - place to bottom left - ds
Duplicate - mirror
Open 56 - resize by 50 % 2x - sharpen - place to bottom left - ds
Open 57 - resize by 50 % 2x - sharpen - place to bottom left - ds
Open 54 - resize by 50 % 2x - sharpen - place to bottom right - ds
Open 64 - resize by 50 % 2x - sharpen - place to bottom - ds
Open 61 - resize by 50 % 2x - sharpen - place to bottom right - ds
On background layer
Click on background with magic wand - new layer
Open paper8 - c/p into selection - deselect
Layers - New mask layer - From Image
Find your mask in source window - hit ok
Merge group
Resize mask by 85% - change opacity to 53
Open 49 - resize by 85% - c/p as new layer
Open 48 - resize by 50% - place to right - ds
Duplicate - mirror
Delete background - merge visible
Adjust - Brightness and Contrast - Fill Light/ Clarity
Fill Light 41 Clarity 45
Hit ok
Add credits and name
Wednesday, November 19, 2014
*click on image to view full size*
PTU Snow Fantasy
This tutorial was written by me on November 19, 2014.
It was made out of my own creation and any similarity is purely coincidental.
I used pspx6 but any version should work without problems.
If you're doing this tutorial you must have good psp knowledge and be familiar with the tools.
Let's get started!
Artist: Lady Silver by Arthur Crowe
Scrapkit: Winter Wishes by Gimptastic Scraps
Mask: 127 by DBV
Font: Carlotta
*open your mask and minimize in your workspace*
c/p = copy and paste, ds = drop shadow
File - New - 700x700 - flood fill w white
Click on background with magic wand - new layer
Open paper8 - c/p into selection - deselect
Layers - New mask layer - From Image
Find your mask in source window - hit ok
Merge group
Open frame 5 - resize by 80 - c/p as new layer
Click inside your frame w magic wand - expand by 5 - new layer
Open paper5 - c/p into selection - deselect
Move paper under frame
Add drop shadow to your frame
Open deco - c/p as new layer - ds
Open glitter - c/p as new layer - move down some
Open fence - place to left - rotate to right a little bit - ds
Open flower 1 - resize by 50% - place to bottom left - ds
Duplicate - mirror
Open tube - resize to your liking - place to center - ds
Open snowy log - place to bottom right - ds
Open snowflake3 - resize by 50% - place to bottom right - ds
Open pillows - resize by 50% 2x - place to bottom - ds
Open mittens - resize by 50% - place to bottom - ds
Open squirrel - resize by 50% - place to bottom left - ds
Open pinecone - resize by 50% - place to bottom - ds
Open jar - resize by 50% - place to bottom - ds
Delete background layer - merge visible
Adjust - Brightness and Contrast - Fill Light/ Clarity
Fill Light 41 Clarity 45
Hit ok
Add credits and name
Sunday, November 16, 2014

*click on image to view full size*
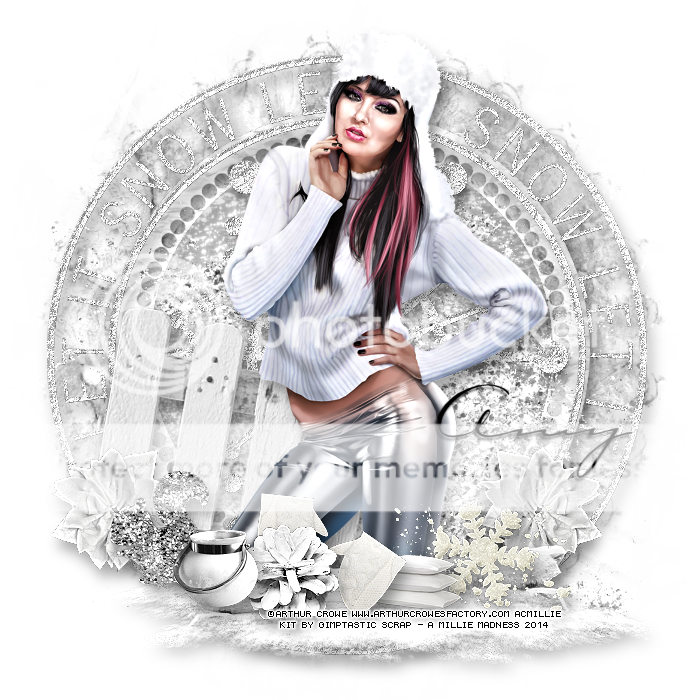
PTU Ready for Christmas!
This tutorial was written by me on November 16, 2014.
It was made out of my own creation and any similarity is purely coincidental.
I used pspx6 but any version should work without problems.
If you're doing this tutorial you must have good psp knowledge and be familiar with the tools.
Let's get started!
Artist: Snow Maiden by Kajenna
Scrapkit: Let It Snow by Kissing Kate
Mask: 2 of Pack 24 by Rocked by Rachel
Font: Coronet PS
*open your mask and minimize in your workspace*
c/p = copy and paste, ds = drop shadow (I'm using V5, H5, Opacity 50, Blur 10, black)
File - New - 700x700 - flood fill w white
Click on background with magic wand - new layer
Open paper2 - c/p into selection - deselect
Layers - New mask layer - From Image
Find your mask in source window - hit ok
Merge group
Open 44 - place to the right - ds
Open frame 2 - resize by 70% - rotate to right some - c/p as new layer
Click inside your frame w magic wand - expand by 5 - new layer
Open paper8 - c/p into selection - deselect
Move paper under frame
Add drop shadow to your frame
Open 45 - resize by 50% 2x - sharpen - place to top - ds
Open 79 - c/p as new layer - move down a little bit - ds
Open 50 - resize by 50% - place to the right - ds
Open 69 - resize by 50% - place to bottom right - ds
Open 80 - resize by 50% 2x - sharpen - place to bottom - ds
Open 70 - place to the bottom and right some - ds
Open 75 - resize by 50% - place to bottom right - ds
Open 61 - resize by 50% 3x - sharpen - place to bottom right - ds
Open 63 - resize by 50% 2x - sharpen - place to bottom right - ds
Open tube - resize to liking - place to left of tag
Xero - porcelain - change blue channel to 0 - hit ok
Add drop shadow to your tube
Open 72 - resize by 50% 2x - sharpen - place to bottom right - ds
Open 78 - resize by 50% 2x - sharpen - place to bottom - ds
Delete background layer - merge visible
Adjust - Brightness and Contrast
Local Tone Mapping - strength 4.0 - Block Size 35 - hit ok
Add credits and name
Wednesday, November 12, 2014

*click on image to view full size*
PTU Winter Presents
This tutorial was written by me on November 12, 2014.
It was made out of my own creation and any similarity is purely coincidental.
I used pspx6 but any version should work without problems.
If you're doing this tutorial you must have good psp knowledge and be familiar with the tools.
Let's get started!
Artist: Misticheskaya
Scrapkit: Christmas Carols by Scrappin' With Lil Ole Me
Plugins: Xero - Porcelain
Mask: 15 by moonbeams and spiderwebs
Font: Skewer
*open your mask and minimize in your workspace*
c/p = copy and paste, ds = drop shadow (I'm using V5, H5, Opacity 50, Blur 10, black)
File - New - 700x700 - flood fill w white
Click on background with magic wand - new layer
Open paper of choice - c/p into selection - deselect
Layers - New mask layer - From Image
Find your mask in source window - hit ok
Merge group
resize mask by 90%
Open 77 - c/p as new layer - center in canvas
Open tube - move under frame - place face to show inside frame
Click inside your frame w magic wand - expand by 5 - new layer
Open paper1 - c/p into selection
Move paper under tube
On tube layer - invert - delete - deselect
Xero - porcelain - default settings - hit ok
Change blend to overlay
Duplicate tube
Add drop shadow to your frame
Open 118 - place to the left - ds
Open 59 - resize by 50% - place to the left - ds
Open 121 - place to the right - ds
Open 125 - resize by 50% 2x - sharpen - place to top right - ds
Open 100 - resize by 50% 2x - sharpen - place to right - rotate some - ds
Open 101 - resize by 50% 2x - sharpen - place to bottom right - ds
Open 72 - resize by 65% - place to the bottom - ds
Open tube - resize to fit your tag - c/p as new layer
Xero - porcelain - default - hit ok - ds
Open 117 - resize by 50% 2x - sharpen - place to bottom right - ds
Open 45 - resize by 50% 2x - sharpen - place to bottom - ds
Open 79 - resize by 50% 2x - sharpen - place to bottom - ds
Open 101 - resize by 50% 2x - sharpen - place to bottom - ds
Open 52 - resize by 50% 3x - sharpen - place to bottom - ds
Duplicate 52 - mirror - move right some
Open 34 - resize by 50% 2x - sharpen - place to bottom left - ds
Delete background layer - merge visible
Adjust - Brightness and Contrast
Local Tone Mapping - strength 4.0 - Block Size 35 - hit ok
Add credits and name
Monday, November 10, 2014

*click on image to view full size*
PTU Count Our Blessings
This tutorial was written by me on November 10, 2014.
It was made out of my own creation and any similarity is purely coincidental.
I used pspx6 but any version should work without problems.
If you're doing this tutorial you must have good psp knowledge and be familiar with the tools.
Let's get started!
Artist: Naughty Pilgrim by Ismael Rac
Scrapkit: We Give Thanks by Karras Kreative Korner
Mask: 19 by moonbeams and spiderwebs
Font: Perpetua Tiling MT
*open your mask and minimize in your workspace*
c/p = copy and paste, ds = drop shadow (I'm using V5, H5, Opacity 50, Blur 10, black)
File - New - 700x700 - flood fill w white
Click on background with magic wand - new layer
Open paper of choice - c/p into selection - deselect
Layers - New mask layer - From Image
Find your mask in source window - hit ok
Merge group
Resize your mask by 65% place to right
Duplicate - mirror - merge down
Open place card - resize by 50% - place to the left - ds
Open leaves 2 - resize by 75% - place to the right - ds
Open basket - place to the bottom - ds
Open pumpkin - resize by 50% - place to bottom and right some - ds
Open ribbon 2 - place to right - ds
Open flower6 - resize by 50% 2x - sharpen - place to bottom right - ds
Duplicate flower6 - mirror - move up some
Open half tube - c/p as new layer - move to left some
Xero - radiance - change beauty to 76 - hit ok
Add drop shadow to your tube
Open turkey - resize by 50% 2x - sharpen - place to bottom - ds
Open cornucopia - resize by 50% - place to bottom left - ds
Open pinecones - resize by 50% 2x - sharpen - place to bottom - ds
Open gravy - resize by 50% 2x - sharpen - place to bottom - ds
Open cranberry sauce - resize by 50% 2x - sharpen - place to bottom - ds
Open flower 3 - resize by 50% 2x - sharpen - place to bottom - ds
Open wordart2 - c/p and place to bottom right
Selections - Select all - float - defloat - modify - expand by 2 - new layer
Fill new layer w cream from your tag or another light color
Move fill layer under wordart - deselect
Merge wordart down to fill and add dropshadow
Delete background layer - merge visible
Add credits and name
Thursday, November 6, 2014

*click on image to view full size*
PTU Let's Give Thanks Tutorial
This tutorial was written by me on November 6, 2014.
It was made out of my own creation and any similarity is purely coincidental.
I used pspx6 but any version should work without problems.
If you're doing this tutorial you must have good psp knowledge and be familiar with the tools.
Let's get started!
Artist: Thankful Bonus by Arthur Crowe
Scrapkit: Give Thanks by Gimptastic Scraps
Plugins: Xero - Radiance
Font: Qamic Sans
*open your mask and minimize in your workspace*
c/p = copy and paste, ds = drop shadow (I'm using V5, H5, Opacity 50, Blur 10, black)
File - New - 700x700 - flood fill w white
Open frame 4 - resize by 80% - c/p as new layer
Click inside your frame w magic wand - expand by 5 - new layer
Open paper5 - c/p into selection - deselect
Move paper under frame
Open heart - place to top right - ds
Open knot - place to left - ds
Open leaf3 - place to left - ds
Open berries - place to right - ds
Open pumpkin - resize by 50% - place to bottom right - ds
Open square brad - resize by 50% - place to left - rotate - ds
Open half tube - resize to liking - c/p as new layer
Xero - radiance - change beauty by 128
Open pilgrim hat - resize by 50% - place to bottom left - ds
Open owl - resize by 50% 2x - place to bottom left - ds
Open thanks - place to bottom - ds
Open turkey - resize by 50% - place to bottom right - ds
On background layer
Open burlap - place to left - ds
Open mask - rotate left - c/p as new layer
Open tag - rotate to right - place to the right - ds
Delete background - merge visible
Add credits and name
Tuesday, November 4, 2014

*click on image to view full size*
PTU Furry and Cuddly in Winter
This tutorial was written by me on November 4, 2014.
It was made out of my own creation and any similarity is purely coincidental.
I used pspx6 but any version should work without problems.
If you're doing this tutorial you must have good psp knowledge and be familiar with the tools.
Let's get started!
Artist: Christmas Dog by Kajenna
Scrapkit: Frostbite by Kizzed by Kelz
Mask: Winter Mask 5 by DDD HERE
Font: akaDora
*open your mask and minimize in your workspace*
c/p = copy and paste, ds = drop shadow (I'm using V5, H5, Opacity 50, Blur 10, black)
File - New - 700x700 - flood fill w white
Click on background with magic wand - new layer
Open paper23 - c/p into selection - deselect
Layers - New mask layer - From Image
Find your mask in source window - hit ok
Merge group
Open 58 - place to the right - ds
Open 9 - place to bottom - ds
Open 4 - resize by 50% - place to top right - ds
Duplicate - mirror
Open 59 - resize by 80% - c/p as new layer - ds
Open 87 - resize by 70% - c/p as new layer
Click inside your frame w magic wand - expand by 10 - new layer
Open paper2 - c/p into selection - deselect
Move paper under frame
Add drop shadow to frame
Open 14 - resize by 50% - 2x - sharpen - place to left - ds
Duplicate - mirror
Open 10 - resize by 50% - 2x - sharpen - place to bottom right - ds
Open 5 - resize by 50% - 2x - sharpen - place to bottom left - ds
Open 111 - c/p as new layer
Open tube - resize by 50% - 2x - sharpen - c/p as new layer
Delete background - merge visible
Adjust - Brightness and Contrast
Local Tone Mapping - strength 4.0 - Block Size 35 - hit ok
Add credits and name
Monday, November 3, 2014

*click on image to view full size*
PTU Holiday Peace
This tutorial was written by me on November 3, 2014.
It was made out of my own creation and any similarity is purely coincidental.
I used pspx6 but any version should work without problems.
If you're doing this tutorial you must have good psp knowledge and be familiar with the tools.
Let's get started!
Artist: Christmas Cat by Kajenna
Scrapkit: Vintage Holiday by Kissing Kate
Mask: 80 by me HERE
Font: Chocolate Box
*open your mask and minimize in your workspace*
c/p = copy and paste, ds = drop shadow (I'm using V5, H5, Opacity 50, Blur 10, black)
File - New - 700x700 - flood fill w white
Click on background with magic wand - new layer
Open paper6 - c/p into selection - deselect
Layers - New mask layer - From Image
Find your mask in source window - hit ok
Merge group
Duplicate - change blend to multiply
Open 20 - place to the right - ds
Open 10 - place to the left - ds
Open 62 - place to right and rotate right some - ds
Open 2 - resize by 50% 2x - sharpen - place to the right - ds
Open frame 3 - reszie by 50% - rotate left some - place to right
Click inside your frame w magic wand - expand by 5 - new layer
Open paper4 - c/p into selection - deselect
Move paper under frame
Add drop shadow to frame and merge down to paper
Open 5 - resize by 50% - place to bottom left - ds
Open 1 - resize by 50% 2x - sharpen - place to the bottom left - ds
Open 7 - resize by 50% - place to bottom right - ds
Open tube - resize by 50% 2x - sharpen - c/p as new layer - place to bottom - ds
Open 22 - resize by 50% 2x - sharpen - place to the bottom left - ds
Open 34 - resize by 50% 2x - sharpen - place to the bottom right - ds
Delete background layer - merge visible
Crop tag to liking
Adjust - Brightness and Contrast
Local Tone Mapping - strength 4.0 - Block Size 35 - hit ok
Add credits and name
Saturday, November 1, 2014

*click on image to view full size*
PTU Feeling that Crisp Fall Air
This tutorial was written by me on November 1, 2014.
It was made out of my own creation and any similarity is purely coincidental.
I used pspx6 but any version should work without problems.
If you're doing this tutorial you must have good psp knowledge and be familiar with the tools.
Let's get started!
Artist: Elias Chatzoudis
Scrapkit: Season of Change by Gimptastic Scraps
Mask: DBV mask 111
Font: Eight Fifteen
*open your mask and minimize in your workspace*
c/p = copy and paste, ds = drop shadow (I'm using V5, H5, Opacity 50, Blur 10, black)
File - New - 700x700 - flood fill w white
Click on background with magic wand - new layer
Open paper4 - c/p into selection - deselect
Layers - New mask layer - From Image
Find your mask in source window - hit ok
Merge group
Open tracks - resize by 70% - c/p as new layer - ds
Open pine branch - place to left some - ds
Open window - c/p as new layer - ds
Open petals - place to left - ds
Open wood scatter - resize by 50% - place to the right some - ds
Open leaf swirl - c/p as new layer - ds
Open leaf 1 - place to the right - ds
Open half tube - resize to liking - place to right - ds
Open label 2 - place to bottom right - ds
Open lantern - place to left - ds
Open gourd - resize by 50% - place to the bottom left - ds
Delete background - merge visible
Crop tag to liking
Add credits and name

*click on image to view full size*
PTU Winter Glow
This tutorial was written by me on November 1, 2014.
It was made out of my own creation and any similarity is purely coincidental.
I used pspx6 but any version should work without problems.
If you're doing this tutorial you must have good psp knowledge and be familiar with the tools.
Let's get started!
Artist: Winter by Alfadesire
Scrapkit: Joyeux Noel by Scrappin With Lil Ole Me
Mask: 84 by WSL
Font: Perpetual Tiling
*open your mask and minimize in your workspace*
c/p = copy and paste, ds = drop shadow (I'm using V5, H5, Opacity 50, Blur 10, black)
File - New - 700x700 - flood fill w white
Open 47 - resize by 75% - c/p as new layer
With freehand tool draw rectangle around frame - new layer
Open pp2 - c/p into selection - move under frame layer - new layer
Open 129 - c/p into selection - deselect - ds
Add drop shadow to your frame
Open 74 - resize by 50% - place to bottom
Open 115 - resize by 50% -2x - sharpen - place to bottom left - ds
Open 42 - resize by 50% -2x - sharpen - place to bottom left - ds
Open 130 - resize by 50% -2x - sharpen - place to bottom right - ds
Open 40 - resize by 50% -2x - sharpen - place to bottom right - ds
Open 39 - resize by 50% -2x - sharpen - place to bottom - ds
Open tube - resize by 65% - place to left - ds
On background layer
Click on background with magic wand - new layer
Open paper14 - c/p into selection - deselect
Layers - New mask layer - From Image
Find your mask in source window - hit ok
Merge group
Move mask to left - duplicate - mirror - merge down
Open 49 - resize by 85% - place to bottom
Open 122 - resize by 85% - place to right - ds
Open 23 - place to left - ds
Open 81 - resize by 70% - place to left - ds
Open 36 - resize by 40% - place to bottom left - ds
Open 22 - c/p as new layer
Delete background layer - merge visible
Adjust - Brightness and Contrast
Local Tone Mapping - strength 4.0 - Block Size 35 - hit ok
Add credits and name

*click on image to view full size*
PTU Painted Gold
This tutorial was written by me on November 1, 2014.
It was made out of my own creation and any similarity is purely coincidental.
I used pspx6 but any version should work without problems.
If you're doing this tutorial you must have good psp knowledge and be familiar with the tools.
Let's get started!
Artist: Gold Babe Year by Arthur Crowe
Scrapkit: Golden Girl Kit by Niqui's Designs
Mask: DD mask 9 HERE
Font: Fleur De Leah
*open your mask and minimize in your workspace*
c/p = copy and paste, ds = drop shadow (I'm using V5, H5, Opacity 50, Blur 10, black)
File - New - 700x700 - flood fill w white
Open 52 - resize by 65% - c/p as new layer
Click inside your frame w magic wand - expand by 5 - new layer
Open paper6 - c/p into selection - deselect
Move paper under frame
Open 22 - resize by 50% 2x - sharpen - c/p as new layer - ds
Open 36 - resize by 50% - place to top right - ds
Open 15 - resize by 50% - place to right - ds
Open 1 - resize by 50% 2x - sharpen - place to bottom - ds
Open 11 - resize by 50% - place to right - ds
Open 8 - resize by 50% - place to bottom - ds
Open 2 - resize by 50% - place to bottom of frame - ds
Open 7 - resize by 50% 2x - sharpen - place to bottom right - ds
Open tube - resize to liking - c/p as new layer
Add drop shadow to your tube
On background layer
Click on background with magic wand - new layer
Open paper14 - c/p into selection - deselect
Layers - New mask layer - From Image
Find your mask in source window - hit ok
Merge group
Open 35 - resize by 50% - place to the right - ds
Delete background - merge visible
Crop tag if you like
Add credits and name
Subscribe to:
Posts
(Atom)
MY BLINKIE
