Monday, October 27, 2014

*click on image to view full size*
PTU Happy Autumn
This tutorial was written by me on October 27, 2014.
It was made out of my own creation and any similarity is purely coincidental.
I used pspx6 but any version should work without problems.
If you're doing this tutorial you must have good psp knowledge and be familiar with the tools.
Let's get started!
Artist: Honey by Jose Cano
Scrapkit: Autumn Harvest by Scrappin Krazy Designs
Mask: 72 by me HERE
Font: Shishoni Brush
*open your mask and minimize in your workspace*
c/p = copy and paste, ds = drop shadow (I'm using V5, H5, Opacity 50, Blur 10, black)
File - New - 700x700 - flood fill w white
Open 34 - resize by 70% - c/p as new layer
New layer - draw a rectangle around your frame
Open pp 6 - c/p into selection - deselect
Move paper under your frame
Add drop shadow to your frame
Open 33 - resize by 50% - place to the top left - ds
Open 15 - place to the top - ds
Open 10 - resize by 50% - place to the right - ds
Open 11 - resize by 50% - place to bottom left - ds
Open 66 - place to the right - ds
Open 46 - place to the right - ds
Open tube - resize to fit tag - place to left
Xero - radiance - change beauty to 112 - hit ok
Drop shadow tube
Open 65 - place to bottom - ds
Open 56 - resize by 50% - place to bottom right - ds
Open 55 - resize by 50% 2x - sharpen - place to bottom right - ds
Open 45 - resize by 50% - place to the bottom right - ds
On background
Click on background with magic wand - new layer
Open paper12 - c/p into selection - deselect
Layers - New mask layer - From Image
Find your mask in source window - hit ok
Merge group
Open 22 - place to bottom - left - ds
Delete background layer - merge visible
Adjust - Brightness and Contrast
Local Tone Mapping - strength 4.0 - Block Size 35 - hit ok
Add credits and name
Friday, October 24, 2014
*click on image to view full size*
PTU Ready for the Cool
This tutorial was written by me on October 24, 2014.
It was made out of my own creation and any similarity is purely coincidental.
I used pspx6 but any version should work without problems.
If you're doing this tutorial you must have good psp knowledge and be familiar with the tools.
Let's get started!
Artist: Kathrine by Verymany
Scrapkit: Frosted Windows by Scrappin' With Lil Ole Me
Mask: 80 by me HERE
Font: Aquarelle
*open your mask and minimize in your workspace*
c/p = copy and paste, ds = drop shadow (I'm using V5, H5, Opacity 50, Blur 10, black)
File - New - 700x700 - flood fill w white
Open 61 - resize by 75% - place to bottom some
Click inside your frame w magic wand - expand by 5 - new layer
Open paper10 - c/p into selection - deselect
Move paper under frame
Add drop shadow to your frame
Open 139 - place to the right - ds
Open 118 - resize by 50% 2x - sharpen - place to bottom left - ds
Duplicate 118 - mirror
Open 121 - c/p as new layer - move down some - ds
Open tube - resize by 50% - move down some - ds
Open 67 - resize by 50% 2x - sharpen - place to bottom left - ds
Open 120 - resize by 50% 2x - sharpen - place to bottom left - ds
Open 75 - resize by 50% 2x - sharpen - place to bottom left - ds
Open 64 - resize by 50% 2x - sharpen - place to bottom - ds
Open 5 - resize by 50% 2x - sharpen - place to bottom right - ds
Open 54 - mirror - place to bottom right - ds
Open 2 - resize by 50% 2x - sharpen - place to bottom - ds
On background layer
Click on background with magic wand - new layer
Open paper1 - c/p into selection - deselect
Layers - New mask layer - From Image
Find your mask in source window - hit ok
Merge group
Open 50 - resize by 75% - place to the right - ds
Open 116 - place to left - ds
Open 86 - resize by 75% - place to right - ds
Delete background layer - merge visible
Add credits and name
Wednesday, October 22, 2014

*click on image to view full size*
PTU Xmas is Coming Early
This tutorial was written by me on October 22, 2014.
It was made out of my own creation and any similarity is purely coincidental.
I used pspx6 but any version should work without problems.
If you're doing this tutorial you must have good psp knowledge and be familiar with the tools.
Let's get started!
Artist: Claudia by Verymany
Scrapkit: Xmas Girl by Niqui's Designs
Mask: 96 by me HERE
Font: any of choice
*open your mask and minimize in your workspace*
c/p = copy and paste, ds = drop shadow (I'm using V5, H5, Opacity 50, Blur 10, black)
File - New - 700x700 - flood fill w white
Click on background with magic wand - new layer
Open paper12 - c/p into selection - deselect
Layers - New mask layer - From Image
Find your mask in source window - hit ok
Merge group
Open 35 - place to left some - ds
Open 15 - resize by 50% - place to left - ds
Open 62 - resize by 50% - place to bottom right - ds
Duplicate - move to left some
Open 54 - resize by 50% - place to the right - ds
Open 51 - resize by 50% - c/p as new layer - ds
Open 40 - place to bottom - ds
Open 25 - resize by 70% - place to right some - ds
Open 32 - resize by 50% - place to bottom left - ds
Open 26 - resize by 50% 2x - sharpen - place to bottom - ds
Open 13 - resize by 50% - place to bottom right - ds
Open tube - resize by 50% - place towards bottom - ds
Open 42 - resize by 50% - place to bottom - ds
Delete background layer - merge visible
Add credits and name
Sunday, October 19, 2014
*click on image to view full size*
PTU Make You Say Boo!
This tutorial was written by me on October 19, 2014.
It was made out of my own creation and any similarity is purely coincidental.
I used pspx6 but any version should work without problems.
If you're doing this tutorial you must have good psp knowledge and be familiar with the tools.
Let's get started!
Artist: Elias Chatzoudis
Scrapkit: Boo by Niqui's Designs
Mask: 54 by me HERE
Plugins: Xero - Radiance
Font: Showcard Gothic
*open your mask and minimize in your workspace*
c/p = copy and paste, ds = drop shadow (I'm using V5, H5, Opacity 50, Blur 10, black)
File - New - 700x700 - flood fill w white
Click on background with magic wand - new layer
Open paper of choice - c/p into selection - deselect
Layers - New mask layer - From Image
Find your mask in source window - hit ok
Merge group
Open 3 - resize by 80% - place to top left - ds
Open 60 - resize by 50% - place to top left - ds
Open 44 - resize by 50% - c/p as new layer - move down some - ds
Open 47 - resize by 50% - mirror - place to the left - ds
Open 9 - resize by 50% - place to the right - ds
Open 22 - resize by 50% 2x - sharpen - place to right - ds
Open 1 - resize by 85% - place to the bottom - ds
Open 24 - resize by 50% 2x - sharpen - place to bottom left - ds
Open tube - c/p as new layer - place so its in the middle
Xero - radiance - change beauty to 112 - hit ok
Add drop shadow to your tube
Open 43 - resize by 50% 3x - sharpen - place to bottom - ds
Open 23 - resize by 50% 2x - sharpen - place to bottom right - ds
Delete background - merge visible
Crop tag to your liking
Add credits and name
Saturday, October 18, 2014

*click on image to view full size*
FTU Let's Be Aware
This tutorial was written by me on October 18, 2014.
It was made out of my own creation and any similarity is purely coincidental.
I used pspx6 but any version should work without problems.
If you're doing this tutorial you must have good psp knowledge and be familiar with the tools.
Let's get started!
Artist: Pinky by Jose Cano
Scrapkit: BCA 2014 Freebie by Tiny Turtle Designs
Plugins: Xero - Radiance
Font: Aquarelle
*open your mask and minimize in your workspace*
c/p = copy and paste, ds = drop shadow (I'm using V5, H5, Opacity 50, Blur 10, black)
File - New - 700x700 - flood fill w white
Open 121 - place to left
Open tube - place under heart frame
Click inside your frame w magic wand - expand by 5 - new layer
Open paper1 - c/p into selection
Move paper under tube
On tube - invert - delete - deselect
Xero - Radiance - change beauty to 112 - hit ok
ADd drop shadow to your frame
Merge tube down to paper and then merge frame down
Open 37 - resize by 50% 2x - sharpen - place to bottom - ds
Open 9 - resize by 50% 2x - sharpen - place to bottom - ds
Open tube - resize to liking - place to right - ds
Open 92 - resize by 50% 2x - sharpen - place to bottom - ds
Open 44 - resize by 50% 2x - sharpen - place to bottom right - ds
Open 6 - resize by 50% 2x - sharpen - place to bottom - ds
On background layer
Open 114 - place to the bottom left - duplicate - mirror - merge down
Duplicate - flip
Open 91 - place to top right - ds
Open 45 - place to left - ds
Open 2 - resize by 80% - place to left - ds
Open 18 - resize by 50% 2x - sharpen - place to the top - ds
Open 36 - place to bottom left - ds

*click on image to view full size*
PTU This is Halloween
This tutorial was written by me on October 18, 2014.
It was made out of my own creation and any similarity is purely coincidental.
I used pspx6 but any version should work without problems.
If you're doing this tutorial you must have good psp knowledge and be familiar with the tools.
Let's get started!
Artist: Witch 2 by Jose Cano
Scrapkit: This is Halloween by Irish Princess Designs
Mask: 54 by me HERE
Font: 13th Ghostwrite
*open your mask and minimize in your workspace*
c/p = copy and paste, ds = drop shadow (I'm using V5, H5, Opacity 50, Blur 10, black)
File - New - 700x700 - flood fill w white
Click on background with magic wand - new layer
Open paper7 - c/p into selection - deselect
Layers - New mask layer - From Image
Find your mask in source window - hit ok
Merge group
Open 85 - place to right
Duplicate 85 - mirror
Open 76 - resize by 50% 2x - sharpen - place to left - ds
Open 67 - place to right - ds
Open 37 - c/p as new layer - ds
Open 19 - resize by 50% - place to left - ds
Open 73 - resize by 50% - place to bottom - ds
Open 17 - resize by 50% - place to bottom left - ds
Duplicate 17 - mirror
Open 89 - place to bottom - ds
Open 95 - resize by 50% 2x - sharpen - place to bottom left - ds
Open 75 - resize by 50% - place to right - ds
Open 38 - resize by 50% - place to bottom right - ds
Open tube - resize to liking - c/p as new layer
Drop shadow tube
Open 88 - resize by 50% - place to bottom
Open 87 - resize by 50% 3x - sharpen - place to bottom right - ds
Open 83 - resize by 50% 2x - sharpen - place to bottom right - ds
Open 62 - resize by 50% 3x - sharpen - place to bottom left - ds
Delete background layer - merge visible
Adjust - Brightness and Contrast
Local Tone Mapping - strength 4.0 - Block Size 35 - hit ok
Add credits and name
Wednesday, October 15, 2014

*click on image to view full size*
PTU Fun With Skulls
This tutorial was written by me on October 15, 2014.
It was made out of my own creation and any similarity is purely coincidental.
I used pspx6 but any version should work without problems.
If you're doing this tutorial you must have good psp knowledge and be familiar with the tools.
Let's get started!
Artist: Elias Chatzoudis
Scrapkit: Skellafun by Gimptastic Scraps
Mask: DBV 113
Font: Ravie
*open your mask and minimize in your workspace*
c/p = copy and paste, ds = drop shadow (I'm using V5, H5, Opacity 50, Blur 10, black)
File - New - 700x700 - flood fill w white
Open frame 4 - resize by 75% - c/p as new layer
Click inside frame - expand by 5 - new layer
Open pp7 - c/p into selection - deselect
Move pp7 under frame
Add drop shadow to your frame 2x - merge down to paper
Open hand - place to right - ds
Open hoodie - place to left - ds
Open tube - c/p as new layer
Xero - porcelain - change blue channel to 0 - hit ok
Drop shadow tube
Open stars - resize by 50% - place to bottom left - ds
Open skullrose - resize by 50% - place to bottom - ds
Open voodoo doll - resize by 50% - place to right - ds
Open potion - resize by 50% - place to bottom - ds
Open skate skull - resize by 50% - place to bottom - ds
Open scarf - resize by 50% - place to right - ds
Open radio - resize by 50% 2x - place to bottom - ds
On background layer
Click on background with magic wand - new layer
Open paper of choice - c/p into selection - deselect
Layers - New mask layer - From Image
Find your mask in source window - hit ok
Merge group
Open glitter dots - place to bottom - ds
Open glitter - place to left - ds
Open star scatter - resize by 50% - place to left - ds
Open scatter - c/p as new layer - ds
Delete background layer - merge visible
Add credits and name
Sunday, October 12, 2014

*click on image to view full size*
PTU Splash of Autumn
This tutorial was written by me on October 12, 2014.
It was made out of my own creation and any similarity is purely coincidental.
I used pspx6 but any version should work without problems.
If you're doing this tutorial you must have good psp knowledge and be familiar with the tools.
Let's get started!
Artist: Cute Sweater SL by Ismael Rac
Scrapkit: Bright Autumn Crisp by Drama Bomb Designs
Mask: DBV 113 HERE
Plugins: Xero - Radiance
Font: TheNautiGal
*open your mask and minimize in your workspace*
c/p = copy and paste, ds = drop shadow (I'm using V5, H5, Opacity 50, Blur 10, black)
File - New - 700x700 - flood fill w white
Click on background with magic wand - new layer
Open paper5 - c/p into selection - deselect
Layers - New mask layer - From Image
Find your mask in source window - hit ok
Merge group
Open 34 - resize by 85% - c/p as new layer
Click inside your frame w magic wand - expand by 5 - new layer
Open paper10 - c/p into selection - deselect
Move paper under frame
Add drop shadow to your frame
Open 83 - c/p as new layer - ds
Open 69 - c/p as new layer - ds
Open 4 - resize by 50% 2x - sharpen - place to right - ds
Open 84 - place to left - ds
Open 110 - place to bottom - ds
Open 106 - c/p as new layer - ds
Open 3 - resize by 50% 2x - sharpen - place to bottom right - ds
Open 90 - mirror - place to left - ds
Open tube - resize to fit tag - c/p as new layer
Xero - radiance - change beauty to 109 - hit ok
Drop shadow on tube
Open 81 - resize by 50% 2x - sharpen - place to bottom right - ds
Open 82 - resize by 50% 2x - sharpen - place to bottom right - ds
Open 107 - resize by 50% 2x - sharpen - place to bottom left - ds
Open 88 - resize by 50% 2x - sharpen - place to bottom - ds
Open 55 - resize by 50% 2x - sharpen - place to bottom left - ds
Open 46 - resize by 50% 2x - sharpen - place to bottom - ds
From top to bottom go thru all the elements and add this additional ds w these settings:
V -3, H 5, Opacity 50, B 10, black
Delete background - merge visible
Adjust - Brightness and Contrast
Local Tone Mapping - strength 4.0 - Block Size 35 - hit ok
Add credits and name

SPECIAL BUY 10-11-14 TO 10-12-14
Get the 2009-2013 Cute Sweater Revamp SL. (13 Layers) FREE with a $2.00 Purchase . Just pop it in your cart at check out. No GC's accepted as a form of payment.
Get the 2009-2013 Cute Sweater Revamp SL. (13 Layers) FREE with a $2.00 Purchase . Just pop it in your cart at check out. No GC's accepted as a form of payment.
Friday, October 10, 2014
*click on image to view full size*
PTU Let The Darkness Call
This tutorial was written by me on October 10, 2014.
It was made out of my own creation and any similarity is purely coincidental.
I used pspx6 but any version should work without problems.
If you're doing this tutorial you must have good psp knowledge and be familiar with the tools.
Let's get started!
Artist: Goth Abby Fairy by Ismael Rac
Scrapkit: Darkness Calls by Gimptastic Scraps
Mask: 54 by me HERE
Font: Biblioteque
*open your mask and minimize in your workspace*
c/p = copy and paste, ds = drop shadow
File - New - 700x700 - flood fill w white
Click on background with magic wand - new layer
Open paper6 - c/p into selection - deselect
Layers - New mask layer - From Image
Find your mask in source window - hit ok
Merge group
Duplicate mask - change blend mode to multiply - merge down
Open splatter - place to top left - ds
Open moon - place to top left - ds
Open deco 2 - place to top - ds
Open cloud - resize by 85% - place to right - duplicate - mirror
Open scatter - c/p as new layer
Open window - rotate to the left - move left - ds
Open cross - place to left - ds
Open tower - place to right - ds
Open paper - resize by 75% - place to right - ds
Open rosary - place to right - ds
Open berries - place to bottom right - ds
Open bible and crucafix - place to bottom right - ds
Open vamp mouth - resize by 50% 2x - sharpen - place to bottom - ds
Open glitter - resize by 75% - c/p as new layer
Open tube - resize to fit your tag - place to right some
Xero - radiance - change beauty to 100 - hit ok
Drop shadow your tube
Delete background - merge visible
Add credits and name
Thursday, October 9, 2014

*click on image to view full size*
PTU Pretty In Fall
This tutorial was written by me on October 9, 2014.
It was made out of my own creation and any similarity is purely coincidental.
I used pspx6 but any version should work without problems.
If you're doing this tutorial you must have good psp knowledge and be familiar with the tools.
Let's get started!
Artist: 2014 Cool N Pretty by Ismael Rac (COMING SOON)
Scrapkit: Cool N Pretty kit made to match by Niqui's Designs
Mask: 25 by me HERE
Font: Rage Italic
*open your mask and minimize in your workspace*
c/p = copy and paste, ds = drop shadow
File - New - 700x700 - flood fill w white
Open 26 - resize by 50% - c/p as new layer
Open tube - place face so its inside frame
Move under frame
Click inside frame w magic wand - expand by 5 - new layer
Open pp2 - c/p into selection - move paper under tube
On tube layer - invert - delete - deselect
Xero - Radiance - change beauty to 97 - hit ok
Add drop shadow to your tube
On frame apply Lokas 3D Shadow w following settings:
Blur: 25 Transparency: 70
Angle X: 0 Angle Y: 0 Angle Z: 0
Zoom: 100 Offset X: 5 Offset Y: 5
Perspective: 40 Color: Black
Hit Okay
Apply Lokas 3D shadow again
Close background layer - merge visible
Move merged to the left
Rotate left some
Open 14 - resize by 50% 2x - sharpen - place to bottom right - ds
Open 22 - resize by 50% 3x - sharpen - place to bottom right - ds
Open 19 - resize by 50% - place to bottom left - ds
Open 30 - resize by 50% 2x - sharpen - place to bottom - ds
Open 25 - resize by 50% 2x - sharpen - place to top left - ds
Open 24 - resize by 50% 2x - sharpen - place to top - ds
Open tube - resize to liking to fit your tag - place to right
Xero - radiance with same settings as above
Drop shadow on tube
On background layer
Click on background with magic wand - new layer
Open paper of choice - c/p into selection - deselect
Layers - New mask layer - From Image
Find your mask in source window - hit ok
Merge group
Duplicate mask - change blend to multiply
Open 16 - place to top - ds
Duplicate - flip and mirror
Open 17 - resize by 50% - place to the left - ds
Open 18 - resize by 50% - place to left - ds
Open 27 - place to top and left some - ds
Duplicate 27 - resize by 50% - flip - move to bottom left
Delete background layer - merge visible
Adjust - Brightness and Contrast
Local Tone Mapping - strength 4.0 - Block Size 35 - hit ok
Add credits and name
Tuesday, October 7, 2014
*click on image to view full size*
PTU Make You Say Please
This tutorial was written by me on October 7, 2014.
It was made out of my own creation and any similarity is purely coincidental.
I used pspx6 but any version should work without problems.
If you're doing this tutorial you must have good psp knowledge and be familiar with the tools.
Let's get started!
Artist: Black Cat Bonus by Roman Zaric
Scrapkit: Jade by Niqui's Designs
Mask: 34 by me HERE
Font: Honey Scripts
*open your mask and minimize in your workspace*
c/p = copy and paste, ds = drop shadow
File - New - 700x700 - flood fill w white
Open 44 - c/p as new layer
Click inside your frame w magic wand - expand by 5 - new layer
Open paper1 - c/p into selection - deselect
Move paper under frame
Add drop shadow to your frame (44)
Open 3 - resize by 50% - place to the right - ds
Open 33 - place to the right - ds
Open 25 - resize by 50% - 2x - sharpen - place to bottom right - ds
Duplicate 25 - place to the left and then move up some
Open 67 - resize by 50% 2x - sharpen - place to bottom - ds
Open 44 - resize by 50% 2x - sharpen - place to left - ds
Open 42 - resize by 50% 2x - sharpen - place to bottom left - ds
Open tube - resize to your liking - c/p as new layer
Add drop shadow to your tube
Open 53 - resize by 50% 2x - sharpen - place to bottom right - ds
On background layer
Click on background with magic wand - new layer
Open paper of choice - c/p into selection - deselect
Layers - New mask layer - From Image
Find your mask in source window - hit ok
Merge group
Open 36 - resize by 50% - place to bottom right
Duplicate 36 - place to top left - merge down - ds
Delete background layer - merge visible
Adjust - Brightness and Contrast
Local Tone Mapping - strength 4.0 - Block Size 35 - hit ok
Crop tag to your liking
Add credits and name
Monday, October 6, 2014

*click on image to view full size*
PTU Giving You That Look
This tutorial was written by me on October 6, 2014.
It was made out of my own creation and any similarity is purely coincidental.
I used pspx6 but any version should work without problems.
If you're doing this tutorial you must have good psp knowledge and be familiar with the tools.
Let's get started!
Artist: Cute Babe by Arthur Crowe
Scrapkit: Stunning Autumn by Tiny Turtle Designs
Plugins: Lokas 3D Shadow, Xero Radiance
Mask: 59 by me HERE
Font: Maratre
*open your mask and minimize in your workspace*
c/p = copy and paste, ds = drop shadow
File - New - 700x700 - flood fill w white
Click on background with magic wand - new layer
Open paper4 - c/p into selection - deselect
Layers - New mask layer - From Image
Find your mask in source window - hit ok
Merge group
Open 99 - resize by 90% - c/p as new layer - ds
Open 8 - resize by 70% - c/p as new layer
Click inside frame (8) w magic wand
Click inside your frame w magic wand - expand by 5 - new layer
Open paper3 - c/p into selection - deselect
Move paper under frame
On your frame apply Lokas 3D Shadow w following settings:
Blur: 25 Transparency: 70
Angle X: 0 Angle Y: 0 Angle Z: 0
Zoom: 100 Offset X: 5 Offset Y: 5
Perspective: 40 Color: Black
Hit Okay
Open 88 - resize by 50% - place to left - ds
Open 67 - place to bottom - ds
Open 65 - place to bottom left - ds
Open 101 - resize by 50% 2x - sharpen - place to left - ds
Open 80 - resize by 50% - place to bottom left - ds
Open 106 - place to right - ds
Open 97 - resize by 50% - place to right - ds
Open 120 - resize by 50% 2x - sharpen - place to bottom right - ds
Open tube - resize to liking
Xero - radiance - change beauty to 64 - hit ok
Drop shadow on your tube
Delete background layer - merge visible
Adjust - Brightness and Contrast
Local Tone Mapping - strength 4.0 - Block Size 35 - hit ok
Add credits and name
Saturday, October 4, 2014
*click on image to view full size*
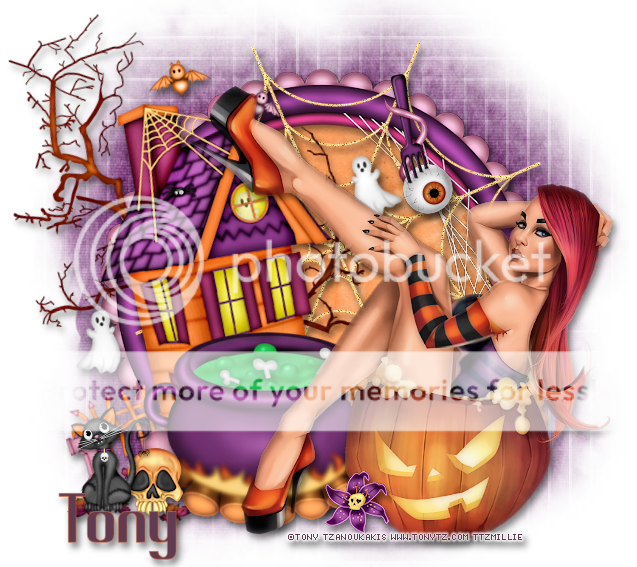
FTU Halloween Time
This tutorial was written by me on October 4, 2014.
It was made out of my own creation and any similarity is purely coincidental.
I used pspx6 but any version should work without problems.
If you're doing this tutorial you must have good psp knowledge and be familiar with the tools.
Let's get started!
Artist: Pumpkin Bath by Tony Tzanoukakis
Scrapkit: Halloweenaholic by Designs by LK
Mask: 17 by me HERE
Plugin: Xero - Porcelain
Font: Poole
*open your mask and minimize in your workspace*
c/p = copy and paste, ds = drop shadow
File - New - 700x700 - flood fill w white
Click on background with magic wand - new layer
Open paper9 - c/p into selection - deselect
Layers - New mask layer - From Image
Find your mask in source window - hit ok
Merge group
Open frame 1 - resize by 80% - c/p as new layer
With freehand tool draw around the frame - new layer
Open paper of choice and c/p into selection - deselect
Move paper under frame
Add drop shadow to frame
Open haunted house - place to left - rotate left some - ds
Open eyeball1 - resize by 50% - place to top right - ds
Open cauldron - resize by 70% - place to bottom - ds
Open skull 1 - resize by 50% - place to bottom left - ds
Open kitty - resize by 50% - place to bottom left - ds
Open tube - resize to liking - c/p as new layer - move to left
Xero - porcelain - change blue channel to 0 - hit ok
Add drop shadow to your tube
Open flower 3 - resize by 50% 2x - sharpen - place to bottom - ds
Delete background layer - merge visible
Adjust - Brightness and Contrast
Local Tone Mapping - strength 4.0 - Block Size 35 - hit ok
Crop tag to your liking
Add credits and name
Thursday, October 2, 2014

*click on image to view full size*
PTU Autumn Brings Bliss
This tutorial was written by me on October 2, 2014.
It was made out of my own creation and any similarity is purely coincidental.
I used pspx6 but any version should work without problems.
If you're doing this tutorial you must have good psp knowledge and be familiar with the tools.
Let's get started!
Artist: Autumn Bonus tube by Jose Cano
Scrapkit: Autumn Bliss kit by Scrappin' With Lil Ole Me
Mask: MB and SW mask 23
Plugin: Xero - Radiance
Font: Inspiration
*open your mask and minimize in your workspace*
c/p = copy and paste, ds = drop shadow
File - New - 700x700 - flood fill w white
Open 73 - resize by 50% - c/p as new layer - ds
Open 41 - resize by 50% - place to left - ds
Open 67 - place to right - ds
Open 118 - place to bottom - ds
Open 33 - resize by 50% 2x - sharpen - place to bottom right - ds
Open 107 - resize by 50% - place to bottom -- move right some - ds
Open 28 - resize by 50% 2x - sharpen - place to bottom left - ds
Open 69 - resize by 50% 2x - sharpen - place to right - ds
Open half tube - resize to liking - c/p as new layer
Place to middle
Xero - radiance - change beauty to 94 - hit ok
Add drop shadow to your tube
Open 117 - resize by 50% 2x - sharpen - place to bottom - left some - ds
Open 109 - resize by 50% 2x - sharpen - place to bottom - ds
Open 83 - resize by 50% 2x - sharpen - place to bottom right - ds
Open 72 - resize by 50% 2x - sharpen - place to bottom - ds
On background layer
Click on background with magic wand - new layer
Open paper25 - c/p into selection - deselect
Layers - New mask layer - From Image
Find your mask in source window - hit ok
Merge group
Open 15 - resize by 50% - place to left - ds
Open 23 - place to right - ds
Open 85 - resize by 85% - place to right and down some - ds
Delete background layer - merge visible
Adjust - Brightness and Contrast
Local Tone Mapping - strength 4.0 - Block Size 35 - hit ok
Add credits and name
Subscribe to:
Posts
(Atom)
MY BLINKIE
